Lateral Thinking
I was searching for a small utility which would store a list of text clips for posting to the forums. As any forum regular (on any forum) will tell you, they're often posting the same answers to questions. Directing users to the GPSoftware support site is one that crops up all the time. All of the clipboard tools I tried had problems - stacks of features; matched only by the number of bugs, horrible interfaces, not playing nicely on Vista. I even tried a Firefox plugin but that wouldn't let you access the configuration for your clips unless you were currently focused in a text box.
Opus to the rescue.
The lightbulb lit up, the cogs whirred, steam filled the computer room. With system-wide hotkeys, floating toolbars and the clipboard command set everything I needed could be done without any additional programs.
Creation not evolution
The first step is, of course, to create the toolbar. From the Settings menu, select Customize.... This should open the customize dialog, make sure the Toolbars tab is showing in this dialog. Alternatively, you can right click on any open space in an existing toolbar and select Customize... from the context menu, this ensures that the Toolbars tab is foremost.
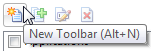
From this dialog you can click the New Toolbar button (or press Alt+N). A new empty toolbar will be created in your lister and you will be prompted for a name. I chose "Steve Clips" but let your imagination roam free here.
Now that we have our new toolbar we need to tweak it slightly so that it's ready for our floating toolbar hotkey. Select your new toolbar in the customize dialog list and configure it using the options selected in the image below.
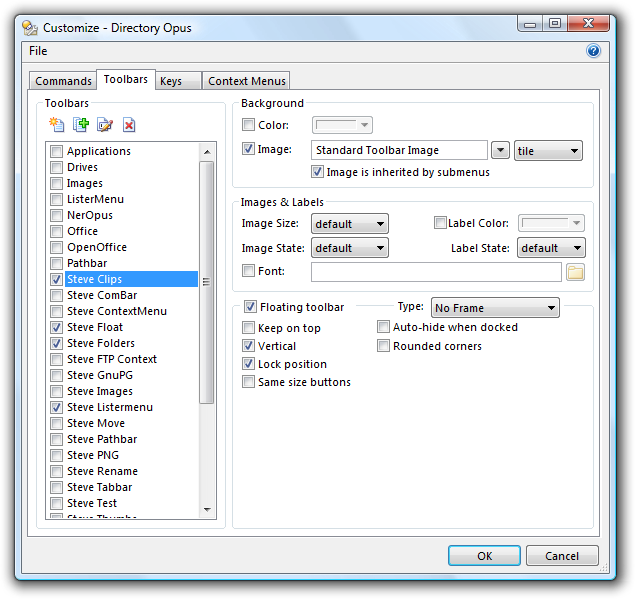
Until you select the Floating toolbar option the new toolbar is shown in your lister. Once it's floating then the other options become available. You can modify these settings to suit your needs but I wanted a toolbar which couldn't be moved, oriented vertically and didn't have any frame. Before you select the Lock position option, move the toolbar to whereever you'd like it to show up.
Listen very carefully, I will say this only once...
Each button on this toolbar will essentially be the same so rather than repeat everything I will just outline the method for the first button. It's very easy to duplicate this first button, once created, using the copy/paste context menu items.
Firstly, locate your new toolbar and right click on it (still in Customize mode of course). Select the New / New Button item and Opus will create a blank button. Double click this button (or right click it and select the Edit... option. The Command Editor will now show with your blank button ready to configure. Click the Advanced... button (at the bottom near OK|Cancel) in this editor, you'll get more room for setting longer clips.
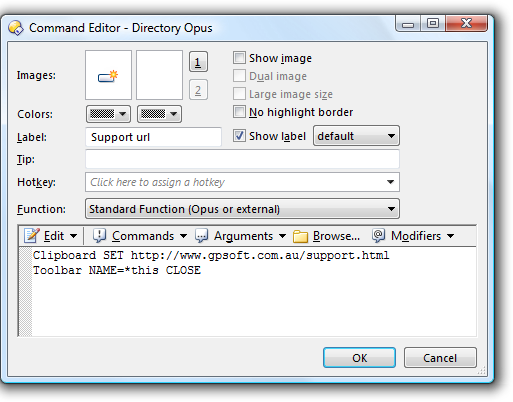
As you can see in the picture above, for the purposes of this toolbar, whilst the image label is showing, there's not much need for an image (you can add one if you wish). The command used is:
Clipboard SET http://www.gpsoft.com.au/support.html
Toolbar NAME=*this CLOSE
The command is very straight forward, Clipboard SET is the internal Opus command and argument which places text into the standard windows clipboard. Everything entered on the line after the SET argument will be placed in the clipboard. In this example, you can see that the url for GPSoftware's support page will be used.
Notice that the second line doesn't actually name the toolbar but instead uses *this to refer to it. A handy tip to know for all sorts of buttons, especially when you may move them between toolbars.
As we don't want this toolbar showing all the time select the tick box next to the toolbar's name in the Customize dialog. This will turn the toolbar off without deleting it. The system-wide hotkey which we'll configure next will toggle it on when we need it.
Florida System-wide Keys
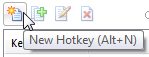
Within the Customize dialog there's a Keys tab. Go there now. As with the Toolbar tab, there's a New Hotkey button - press it now.
In the hotkey Command Editor you can configure the hotkey used and the command run. Don't forget to make it system-wide so that it works even without an Opus lister having focus.
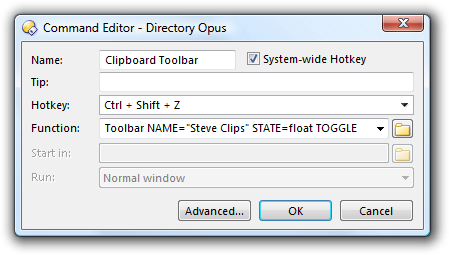
I've chosen Ctrl+Shift+Z as my hotkey, simply because it won't conflict with anything else and can easily be done with one hand (snigger...). The command used is:
Toolbar NAME="Steve Clips" STATE=float TOGGLE The command and arguments used here should be self-explanatory (see the manual if they're not). Don't forget to use the name of your toolbar and enclose it in quotes if it contains spaces.
You can add a further command (POS=mouse) to the hotkey so that the toolbar pops up under the mouse pointer instead of a fixed location. Simply change the command to:
Toolbar NAME="Steve Clips" STATE=float TOGGLE POS=mouseThe fat lady sings
Once you've configured the hotkey, close the customize dialog (click OK on any dialog still open) and that's it. You should now have a floating toolbar which will popup on command. Perfect for spamming your favourite forums (just don't try it here).

 ArsClip was made for this reason and i leave it running if i am working in several documents.