I recently transitioned to a new computer, moving from Windows 7 to Widows 10. I'm trying to set up DOPUS 11.19 on the new computer. The old one has drive buttons but I can't figure out how to get them on the new computer using the same version of DOPUS on both computers. I have screen shots to upload, but not sure how to do it.
If you still have the old computer, use Settings > Backup & Restore in Opus to backup your config and transfer it to the new PC.
Failing that, you should find a Drives toolbar as part.of the default configuration if you've done a fresh install.
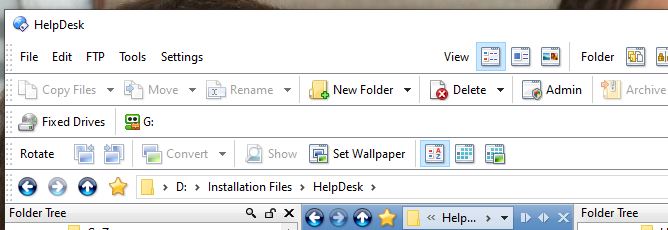
Wow, that was a quick reply. Thank you. I do have a Drives tool bar on the new computer, but it contains the following only:
Fixed Drives (with icon), clicking on that icon does nothing.
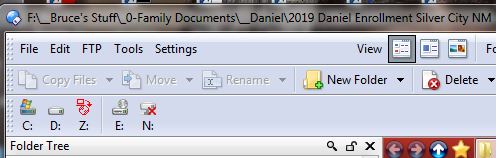
On the old computer the Drives toolbar has the following (with icons):
C: D: Z: E: N:
I tried reading other posts as well as the help file to fix this, but can't untangle the info.
If there were an option to upload screenshots I would.
I just noticed when plugging in a USB flash drive I now have:
Fixed Drives | G:
But the fixed drives aren't listed like they are on the other computer.
It'll look like that when editing the toolbar.
Click OK or Cancel in the Customize dialog to stop editing, and those buttons will turn into a list of drives (according to the commands and arguments inside the buttons).
I am not editing the toolbar and I don't have any edit or cancel buttons. I also do not have a customize dialog.
You should be able to upload screenshots now. Drag & drop any image in PNG or JPG format.
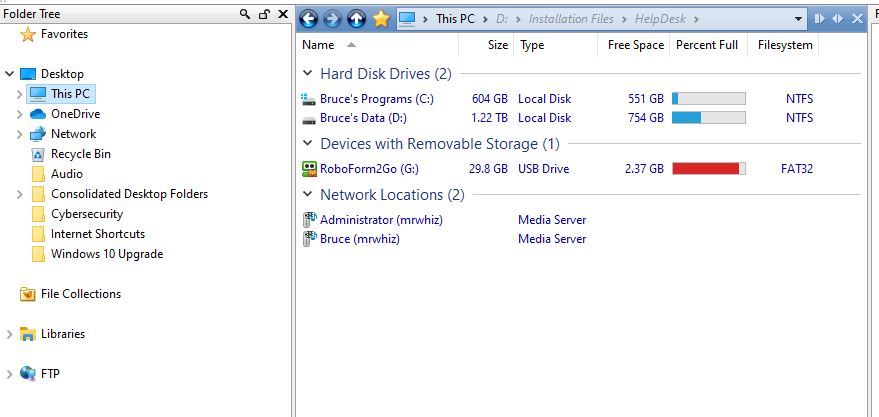
Could you show us the toolbar and also what your This PC folder looks like?
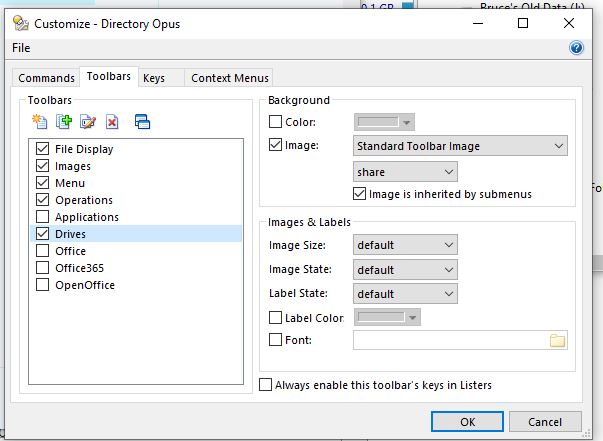
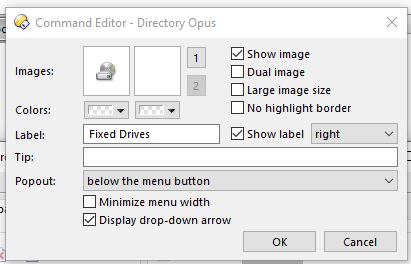
If you select Settings > Customize Toolbars to edit the toolbars, then right-click where it says Fixed Drives and choose Edit (double-click also works), what's the command that it runs?
I think it should normally be this, or similar:
Go DRIVEBUTTONS=fixed
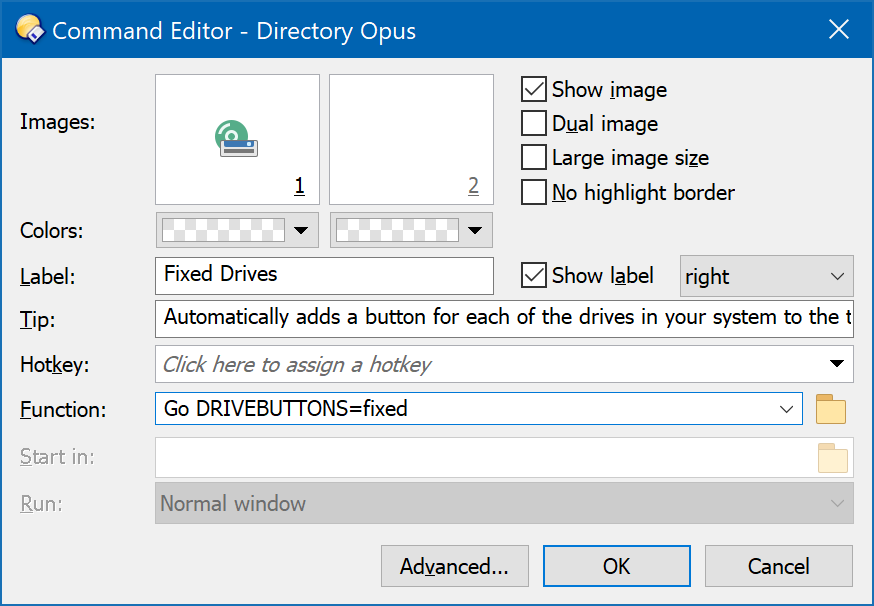
I must have a different version than you. I right click on Fixed Drives and there is no edit option. There is no command that runs. I get the following dialog:
Right-click on the button that's on toolbar, back in the main window (while still in Customize Toolbars mode).
Did that, but don't have the same image that you do.
I don't understand why this is so complicated. I just want my drive buttons back. One button for every drive. I have a drop down arrow now that does nothing.
That's a menu, not a button.
Yes, this toolbar must've been edited from the default one, or maybe it was created by hand.
If you create a button on the toolbar and set it to the command in my screenshot (Go DRIVEBUTTONS=fixed), it should do what you want.
I don't have any place to enter GO commands. Maybe my version of Opus is corrupt? and I do want buttons. One for each drive. Whenever I insert a drive in the USB port I want Opus to create a button for it. This computer has two permanent drives, C and D. It doesn't have a DVD player, but I have an external one that plugs into the USB port along with several flash drives, and a 4 TB external drive. I want the C and D drive buttons always there, and new buttons for each drive I connect. I had all this on my windows 7 computer running the same version of Opus.
Why is this so hard to do? I think it was automatic when I installed it on Windows 7.
Here's what I got from following your instructions. None of these three buttons do anything at all:
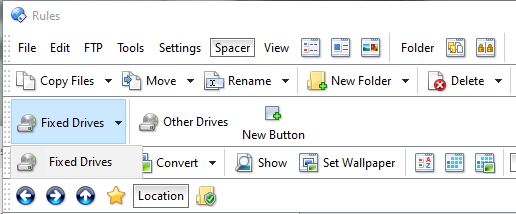
You are still making, or adding things inside of, a menu.
You need to make a button, not a menu. Create a new button on the toolbar (not inside of a menu) and it will have a field to enter the command into.
The page I linked has instruction on creating buttons near the top:
- Select Settings -> Customize Toolbars (the Customize window will open; keep it open but move it out of the way)
- Back in the main window, right-click your toolbar somewhere and (depending on where you clicked) there will be a New or Insert New sub-menu. Click that sub-menu, and then New Button
It's not difficult to set up; just pay close attention to what the instructions say and you should be good to go.
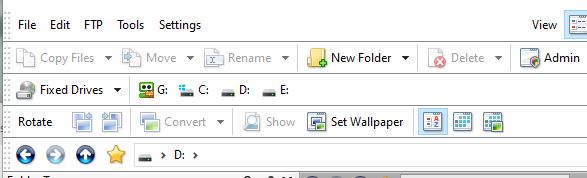
Funny thing. Like magic after I went away and came back the drives magically showed up!
Now if I could just make them appear in alphabetical order and get ride of that Fixed Drives Dropdown menu that has nothing in it all would be fine. Also the new listers that pop up when I plug in the drives is not really necessary, but it's easy to shut them down.
I don't know if the difference in the way things work is due to switching to windows 10 or some other strange voodoo, but I can live with have I have now even if I can't make it totally behave like it did on the windows 7 computer. I've never had this struggle until I switched to Windows Stupid 10!
The only remaining obstacle so far is to get all my Outlook settings transferred over so I can use Outlook instead of the dreaded webmail (I have over 10 accounts set up in Outlook), but that's another subject for an other venue.
Thanks for your help. I'm going to poke around and see if I can make that Fixed Drives thing go away. maybe I can just delete it. Doesn't make sense for the G drive to come before the C drive, but at least they are all there.
Just for grins, I plugged in my external DVD player into the USB hub, and it couldn't handle the power drain. So I plugged it into a USB slot on the docking station and it came up as an H drive,, in between the G and C drives like this:
G: H: C: D: E:
G and E are both plugged into the same USB hub. But at least all the drives are there. C and D are separate partitions on my internal SSD drive.
I notice that the icon of G: looks like a RoboForm icon, so I don't have much idea what it's doing there.
Since you've got something approaching what you want, I suggest making a backup of your configuration before changing anything else.
Do you know how to do that? (Settings -> Backup and Restore)
I have more to say on your main issue, but I'm not going to suggest anything else until I'm reasonably sure you have a configuration backup.
Use Settings > Customize Toolbars again and look at your toolbar.
Right click the unwanted menu and choose Delete.
Then look at what remains. You probably have two buttons. The first probably generates a list of removable drives. The second generates a list of fixed drives. If you want them in the opposite order, drag one of them to the place you want it.
Or, delete one of those buttons, then edit the other one to remove the =fixed or =removable from the command which is filtering the list of drives. With just Go DRIVEBUTTONS on its own, a single button will generate a list of all drives, all types at once.
When done editing the toolbar, click OK in the Customize window to save the change and return to normal, where the buttons you were editing will turn into drive lists.
1 Like