With version 13, DOpus offers integrated dark and light themes that can be easily switched between. The themes can be designed to a high degree freely. With this innovation, icon sets can now be created that can automatically display light versions of the icons for the dark theme and dark versions for the light theme. I have created a script here that can be used to easily create both traditional and new icon sets suitable for dark/light themes. The script provides the CreateIconset button command with various arguments. Normally (i.e. without the NODIALOG argument) a dialog opens in which various settings can be made.
The script also works perfectly with DOpus v12. The icon sets created for dark/light themes are accepted by DOpus v12, but only the black (light theme) icons are displayed there.
Requirements
The command line tool montage.exe is required to create the required multi-image files. The tool is part of ImageMagick and can be downloaded with the portable version of ImageMagick (link at the end of this post). Since montage.exe is free software, I included it in the CreateIconset download. The path to montage.exe must be specified in the script configuration. I entered /dopusdata\User Data as the default.
Script configuration
The following default settings can be made in the configuration of the script:
- Appendix: Since for Dark/Light Icons, light icons (for Dark Theme) and dark icons (for Light Theme) with identical names must be in the same folder, the icons for the Dark Theme (the light ones) must have an appendix. The default is _0. You can enter another appendix here.
- Artist: The author/artist of the icon set can optionally be specified here. This information will be displayed for the icon set in preferences.
- Copyright: Can also be specified optionally, by default in the form (c) [year] [name].
- Category: You can specify your own categories here, which will be included in the selection box in the dialog. The categories in the button editor allow you to filter by category when selecting an icon.
- Language: the language of the dialog. German and English are available to choose from. The default language is english.
- Small_Icons: The size of the small icons. Default is 22 (22x22 pixels) 20 or 24 can also be set, but large values should not be set in the script configuration for high DPI settings. The default values are actually good for all purposes.
- Large_Icons: The size of the large icons (default 32).
- Small_Icons_HighDPI: The small icons with high DPI factor (default 48).
- Large_Icons_HighDPI: The large icons with high DPI factor (default 64).
- PathMontage: As described above, the path to montage.exe
- PathOutput: Path to which the iconset file [Iconsetname].dis should be copied. By default it is placed in a new folder "Iconset" in the working folder. If the file already exists, the older version will be renamed. If the path is changed to {sourcepath}, files with the same name that already exist there will be deleted. When the process is finished (can take a while with many icons) CraeteIconset automatically switches to the output folder and selects the new file.
The dialog
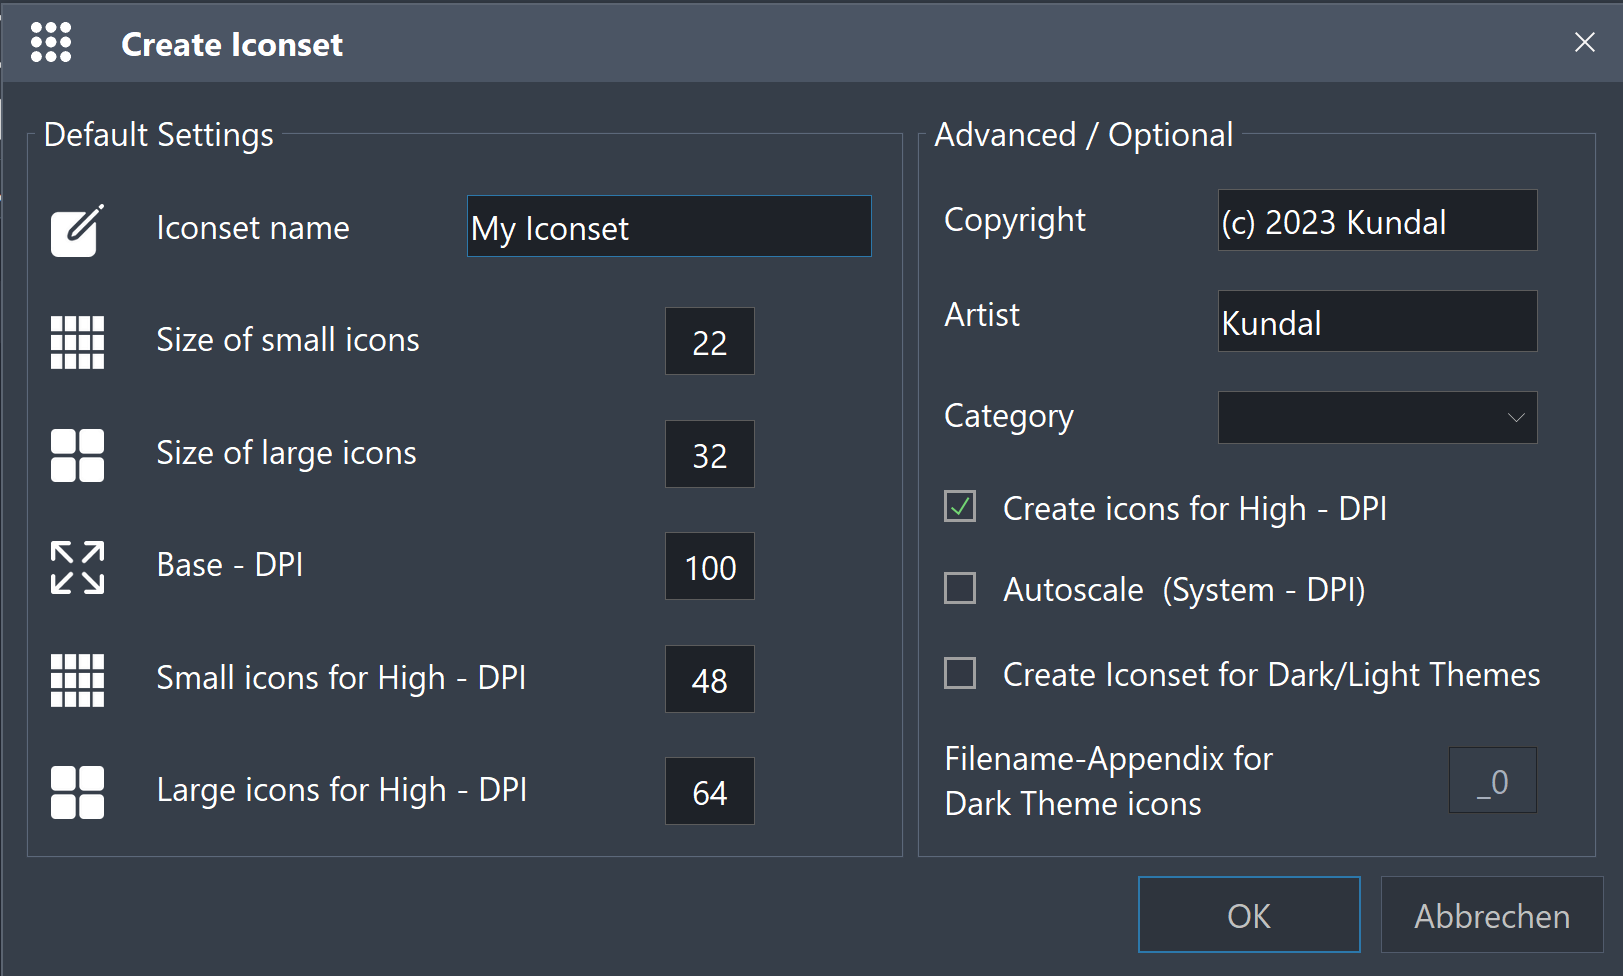
The script provides the CreateIconset button command. Without any further arguments, the command opens the dialog with the following default settings:
Icon set name: default ist the name of the current folder. So it makes sense to copy the image files to be processed into a folder with the desired icon set name.
Icon sizes: small icons 22, large icons 32, small icons for high-DPI 48, large icons for high-DPI 64. These sizes correspond to GPSoft's default settings for a "DPI-aware" icon set. For use on different systems with different DPI settings, these settings are well suited.
Base DPI: Default 100. For an icon set to be used on different systems, the default value should be kept.
Copyright and Author: Blank or setting in the script configuration
Category: Empty, you can enter your own category here or select one of the standard categories from the popup. Categories entered in the configuration are also included in the selection.
High DPI Settings Icons: Enabled by default. For a "DPI-Aware" icon set that works on different systems, this checkbox must remain activated, otherwise large icons will not be created and the corresponding scaling instructions will not be written into the XML.
Autoscale (System DPI): The icon sizes are automatically scaled for the current system DPI-scaling-factor and the corresponding input field will be set to this factor. Useful for an icon set created exclusively for the current system (or others with the same DPI settings). In this case, the Icons field can also be disabled for high DPI settings. Only small and large icons are then created, scaled appropriately for the system's DPI settings.
Create icon set for dark/light themes: disabled by default. If activated, an icon set with dark and light icons for dark/light themes will be created. This requires special preparation of the icon files.
Filename appendix for dark theme icons: default _0. As described in the script configuration, the icons must have identical names and be made distinguishable by an appendix. It is important that the light icons (for dark themes) get the appendix, otherwise the icons will be assigned incorrectly. CreateIconset then takes care of checking and sorting the pairs. Image files that do not form a matching pair are sorted out.
More dialogs
- If no image files (grp:images) or SVG files were found in the folder, an error message appears and the process is aborted.
- When a dark/light icon set is created, there is also an error message with cancellation if no suitable icon pairs were found.
- If files were sorted out when creating a dark/light icon set because they do not form a pair, an information message appears stating the number of files sorted out. Clicking OK creates the set anyway; Cancel aborts the process.
Button command and arguments
The CreateIconset command opens the main dialog. The following arguments are available that can override the script configuration defaults:
NAME specify the name of the icon set
DARKLIGHT create an icon set for dark/light themes.
AUTOSCALE Activate the automatic scaling function
NOHIGH do not create large icons for high DPI settings and DPI scaling instructions
NODIALOG the icon set is created without opening the dialog.
The command CreateIconset NODIALOG creates a standard icon set with icons that are scalable for high DPI settings with one click. If the DARKLIGHT argument is also added, a corresponding dark/light icon set is created.
Source material for icon sets
Montage.exe processes pretty much every conceivable image format in all sizes and dimensions. Of course, the quality of the result will be rather poor if the source files are very small and need to be scaled up. If the source files are not square, scaling will distort them. So if you want to turn your vacation photos into icons, you should create square cutouts beforehand.
The only files that are absolutely taboo are those that contain multiple images (e.g. *.tiff). montage.exe would unpack and process the images. Since the Iconset XML knows nothing about these files, incorrect assignments would occur.
Source material for dark/light icon sets
Free icons are freely available on many sites on the internet. But if you're looking for larger collections, you have to look more closely at the developers, e.g. on Github.
In the simplest case, dark/light icons require black and white versions of the icons. Colored icons often works for both themes. I have found some collections that contain black icons for pretty much every purpose. The links provided below are direct downloads of the source files. All icons are available in SVG (Scalable Vector Graphic) format as black icons. The format has the advantage of being scalable as desired without any loss of quality. The disadvantage is that conventional tools like Magick or Nconvert cannot do anything (good) with the format. The originals are usually very small (e.g. 20x20 pixels) and must be scaled before processing. Since SVG's are simple text files (XML), you can do this with a text editor. I included a menu button in the download package which contains a button (Label: Scale SVG files) that brings all selected SVGs to the desired size. The button can be used multiple times for the same files. The button will work with the provided collections but not necessarily with other SVG-files.
In the download packages linked below you first need to find the folder with the SVG files. Extract the folder and, ideally, rename it according to the desired name of the icon set. If there are a lot of icons, the folder must be in a short path (e.g. D:\My Iconset) because otherwise montage.exe will fail. For me, the limit is reached at less than 1000 icons with a short path, and a few hundreds with longer paths. Now you can use the Scale SVG files button to scale the icons to the desired size. Since all icons are black you now need to invert them to white icons for the dark theme. I have included another button (label Create white SVG files) to do this and append the chosen appendix to the white icons names at the same time.
Now just press the button with the CreateIconset command of your choice, if necessary change settings in the dialog (don't forget to tick Create Iconset for Dark/Light Themes) and the Iconset will be created.
Direct download links to the icon collections
Akar-Icons 393 Icons/370 KB
Font-Awesome 2025 Icons, 3,43 MB
Ionicons-Icons 1338 Icons, 1,63 MB
MaterialDesign 7367 Icons, 3,57 MB
Dripicons 200 Icons 4,63 MB
Zondicons 298 Icons, 99 KB
ImageMagick portable
ImageMagick portable
CreateIconset v1.1
Content: CreateIconset.osp (Script-packet)
CreateIconset (Menu-Button)
montage.exe
License.txt (montage-License)
CreateIconset.zip (9.3 MB)