2017 update: This could do with re-writing using the proper scripting and metadata APIs in newer versions of Opus.
Everything below was made before those existed, and the way it works is not recommended these days. Don't look to this post for a model way of doing anything, but you may still find what it does useful.
Purpose of the button:
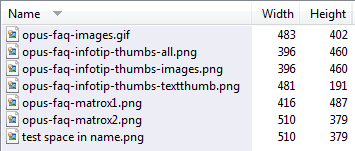
Given a list of images such as this:
...this button will produce the following in the clipboard:
<img src="http://www.example.com/images/opus-faq-images.gif" width="483" height="402" alt="" />
<img src="http://www.example.com/images/opus-faq-infotip-thumbs-all.png" width="396" height="460" alt="" />
<img src="http://www.example.com/images/opus-faq-infotip-thumbs-images.png" width="396" height="460" alt="" />
<img src="http://www.example.com/images/opus-faq-infotip-thumbs-textthumb.png" width="481" height="191" alt="" />
<img src="http://www.example.com/images/opus-faq-matrox1.png" width="416" height="487" alt="" />
<img src="http://www.example.com/images/opus-faq-matrox2.png" width="510" height="379" alt="" />
<img src="http://www.example.com/images/test%20space%20in%20name.png" width="510" height="379" alt="" />
This can be a huge time-saver if you are editing HTML by hand and need a list of IMG links with the correct width and height values.
Of course, the http://www.example.com/images/ prefix is configurable.
The button will include the name of each image's parent directory in the URLs it generates. If you do not want this, see the Configuring the button section below.
Important:
The default version of the button is limited to about 500 characters, after which the clipboard string will be truncated. You can remove this limit by changing the button to use SetClip.exe. See below for details.
(This whole thing should be re-written really. Newer versions of Opus have better ways of doing everything in this post.)
Installing the button:
- Download IMG_links_to_Clipboard.zip (2.0 KB)
- Extract the zip file, giving you IMG links to Clipboard.dcf. (This step is important. Don't just double-click the zip to enter it. Extract it.)
- Enter Customize mode in Opus, via Settings -> Customize Toolbars.
- Drag the IMG links to Clipboard.dcf file to your Opus toolbar and it will turn into a button.
- (Optional) Right-click the newly created button and select Edit, then configure it as described below.
- Click OK in the Customize window to exit Customize mode.
You can now select some image files and click the button to put their IMG links into the clipboard.
Configuring the button:
If you install and edit the button, as described above, then you should see the following at the top:
Rename FILEINFO TO "P_{parent}|W_{picwidth}|H_{picheight}"

@script vbscript
Option Explicit

' Remove the "P_{parent}|" part in the Rename line at the top if you do not want the name
' of the parent directory to be included in the URL.

' If you want to add a prefix to the URL, set it here.
' For example, if you want to generate absolute URLs you would set something like
' strUrlPrefix = "http://www.example.com/"
' Leave it blank if you don't want a prefix.
Dim strUrlPrefix
strUrlPrefix = ""

' If you have SetClip.exe on your machine then set fUseSetClip = True to use it instead of
' Opus's "Clipboard SET" command. Doing this enables the script to set clipboard strings
' which are bigger than the maximum command-line length.
' Get SetClip.exe from here: http://www.pretentiousname.com/miscsoft/index.html#SetClip
Dim fUseSetClip
fUseSetClip = True

' Where to find SetClip.exe, if you have it at all. Only used if fUseSetClip is True.
Dim strSetClipPath
strSetClipPath = "C:\Windows\System32\SetClip.exe"

' Where to find DOpusRT.exe, the command used to set the clipboard if fUseSetClip is False.
Dim strOpusHomePath
strOpusHomePath = "C:\Program Files\GPSoftware\Directory Opus\DOpusRT.exe"
You can edit those values to configure the script:
-
P_{parent}:
On the first line you'll see this:
Rename FILEINFO TO "P_{parent}|W_{picwidth}|H_{picheight}"
If you do not want each image's parent directory name to be included in the URLs the button generates, remove the P_{parent} part so the line looks like this:
Rename FILEINFO TO "W_{picwidth}|H_{picheight}" -
strUrlPrefix:
Whatever you set strUrlPrefix to is inserted at the start of each URL that the button generates. It is blank by default. If you want to generate fully-qualified URLs then you would set strUrlPrefix to something like this:
strUrlPrefix = "http://www.example.com/images/" -
fUseSetClip:
By default the script puts strings into the clipboard using Opus's Clipboard SET command, via DOpusRT.exe. Unfortunately, due to maximum command-line limits in Windows, this means there is a limit of about 500 characters before the clipboard string starts being truncated.
To work around this limit, install my little SetClip and set fUseSetClip = True instead of False.
I thought it was better for the script not to require SetClip.exe out-of-the-box but without SetClip.exe the script is limited to working with only a few files at a time.
-
strSetClipPath
This tells the script where to find SetClip.exe. It is only used if fUseSetClip = True and it points to C:\Windows\System32\SetClip.exe by default. If you copy SetClip.exe to somewhere else then change the script.
-
strOpusHomePath
This tells the script where to find DOpusRT.exe, which is part of Opus. It is only used if fUseSetClip = False and it points to C:\Program Files\GPSoftware\Directory Opus\DOpusRT.exe by default. If you installed Opus to a different location, and are not using SetClip.exe, then you should change this.
How the button works:
The button is actually a Rename command which uses VBScript, but it doesn't actually rename any of the files.  I have written a separate post, "Abusing" Rename Scripts to do other things with file info which explains this technique without the complications this button adds by having to set the clipboard.
Note that this is a bad way to do things these days. Newer versions of Opus have proper scripting almost everywhere and don't require things to be shoehorned into a Rename script when they have nothing to do with renaming. This whole button/post should be re-written, ideally.
Another thing to note is that the button itself contains the rename script. There is no need to create a Rename Preset to contain the script as it is all in the button. This is good because a Rename Preset would get in your way when you actually wanted to rename some files via the Rename window.
