TagMaster brings tagging in Directory Opus to another level. It gives you an easy to use interface where you can manage them through a database, add them or remove them from files with a single click, plus edit descriptions and ratings. You can run it linked to your current file display selection or in a fuller standalone mode for batch work.
Features
- Global tag database for searching and reusing tags across files.
- Cloud-like interface for tags with quick visual browsing and single-click add/remove.
- Support for categories and subcategories across your keywords.
- Search field to find tags fast.
- Bulk apply and "Add all" to tag many files at once.
- Per-file description editor for short captions or notes.
- Star rating editor integrated in the panel.
- Two operation modes: Linked (follows Opus selection) and
FULL(managed file queue). - Preview and properties panes so you can confirm content before applying metadata.
- Apply / Reset workflow to stage changes before committing.
- Optional wildcard
FILTERpreselection for easy file management selection. - "No-block" concept applied when reading metadata. So you can cancel the command at any time instantly.
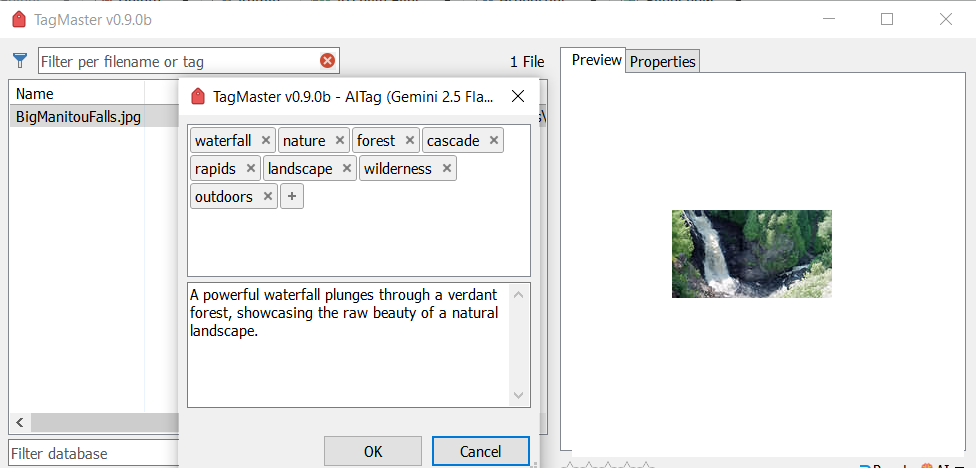
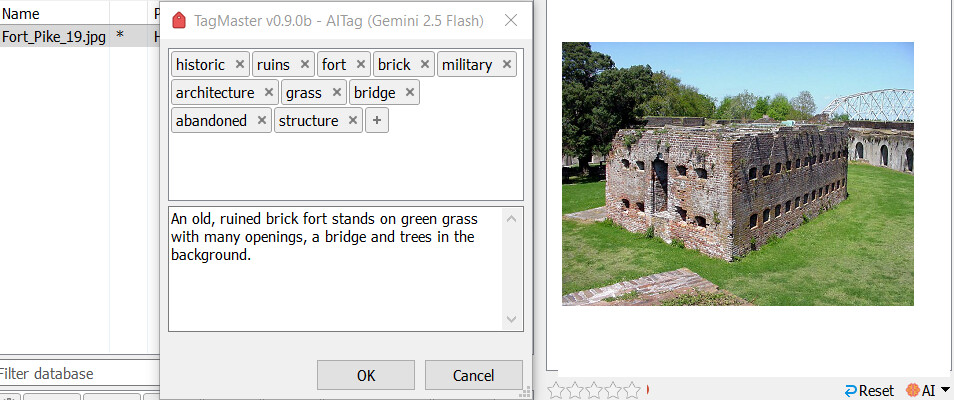
- AutoTag: automated analysis for images and PDFs to generate suggested tags and a short description (read About AutoTag section).
- AutoSort uncategorized tags: automated sorting for uncategorized keywords (read About Categories section).
Requirements
- Directory Opus 13.20.3 or newer.
How to Install
Download the file from releases and double click it. Or follow the instructions from here
Latest version : Download from here
Usage
Run the command by using TagMaster.
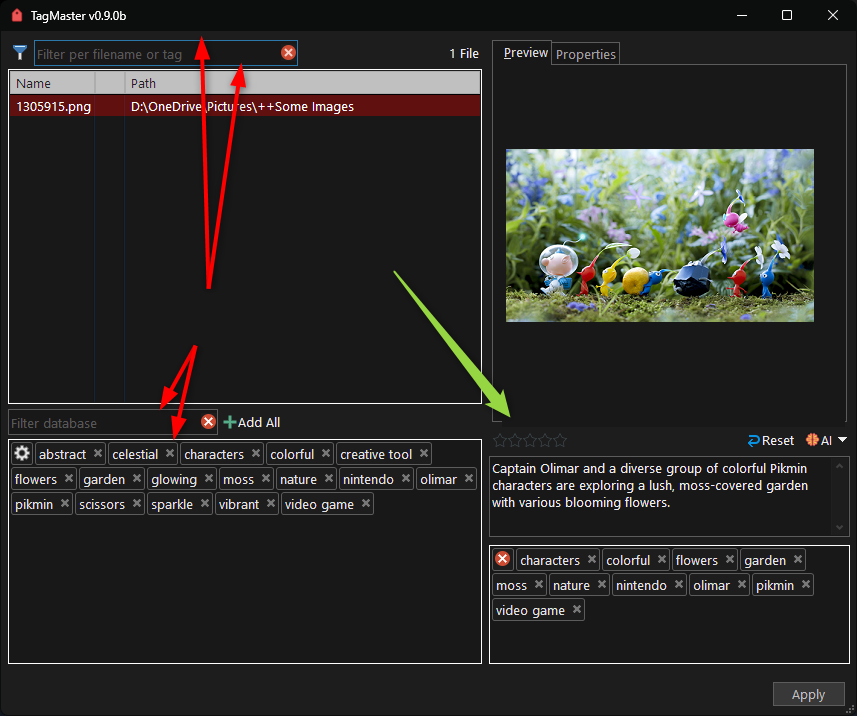
By default the dialog links to the current selection: pick files in Opus and the panel shows their tags, description input, preview, and rating values. There's also the FULL mode dialog, who has more additions and where you can work with any passed file and drop files in to add them to the batch.
In FULL mode, when folders are passed, they are read non-recursively by default (Use RECURSIVE to make it recursive). Otherwise they are ignored.
In AUTOTAG mode, you can set the files you want to handle automatically using AI models. More details in the Autotag argument section.
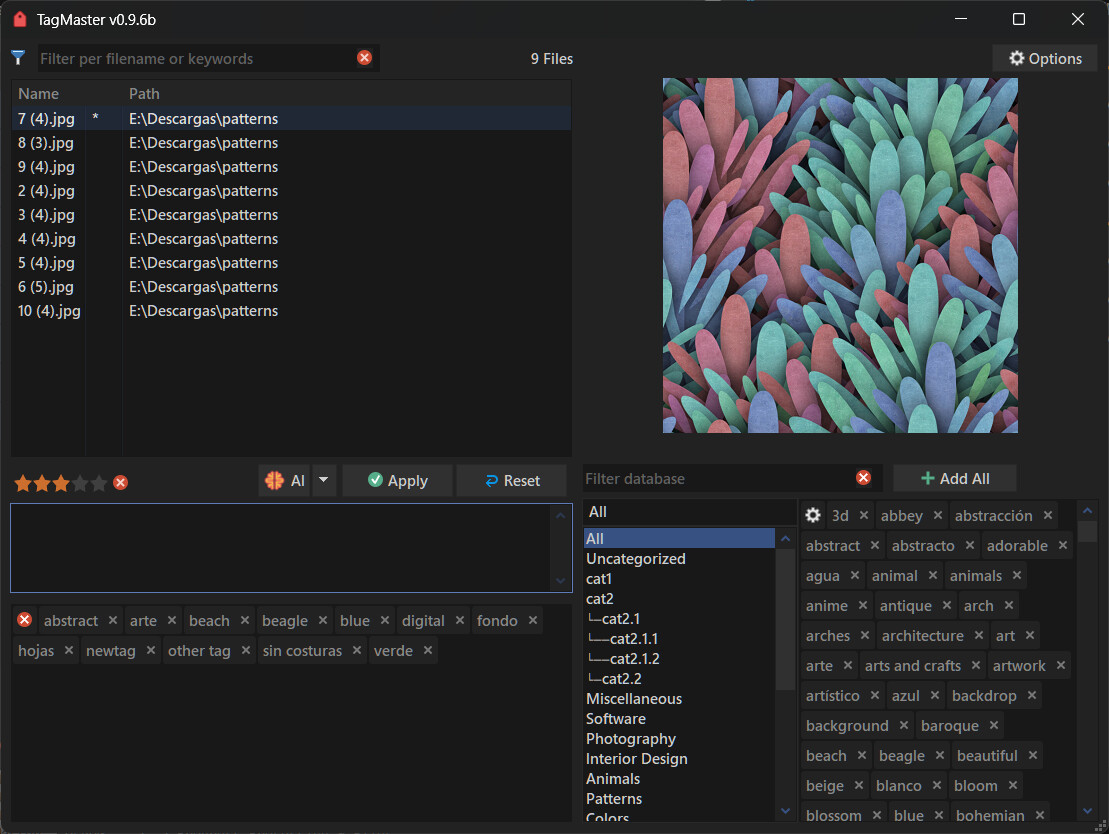
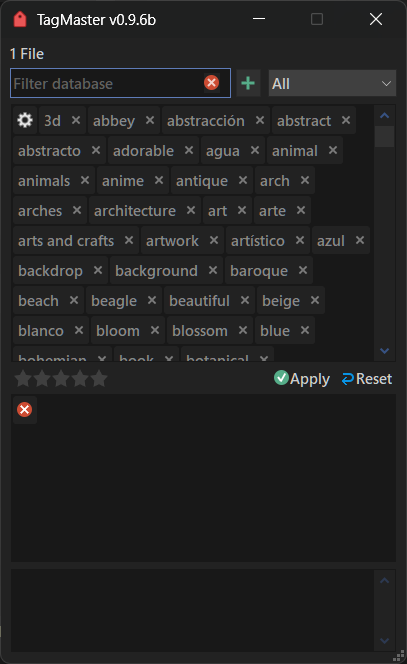
Tagging
There are 2 panels in the window: one that shows the tag database (which has a filter at the top) and another panel that lists the common tags for the selected files.
Click any tag in the database to add it to the selection.
To remove a tag from the selection, click the ⓧ on the tag you want to remove in the list panel.
To remove ALL tags from the selection, click the ⓧ in the list panel and confirm in the following dialog.
To remove a tag from the database, click its corresponding ⓧ and confirm in the following dialog.
You can add ALL tags listed in the tags panel using the "Add All" button. (Be careful where you use it.)
You can also add new tags that are not in the database. To do that, perform a search and the script will automatically detect if the tag is new, giving you the option to add it to the database and to the selection. You can add multiple tags if you separate them with ";".
Click the Options icon (cog) in the tag database panel to access options:
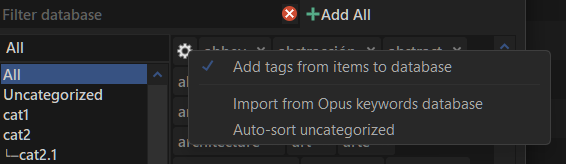
- Add Tags from items to database: By default, the script adds every tag it finds to your database. Disabling this option makes the database read-only.
- Import from Opus database: Opus has its own tag database. This option lets you import it for use.
- Auto sort Uncategorized: Automatically sort uncategorized keywords with IA. (more in About Categories section).
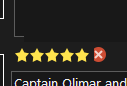
Setting rating
You can also set the rating for the selection simply by clicking the rating you want.
Press the ⓧ button to clear the rating.
When multiple files are selected with different ratings, the text "multiple values" will be shown.
Setting description
You can set a description only when there is exactly 1 file in the selection.
Reset
Pressing this button will reset all values to their initial state (the state when the file was first read).
Apply
Press the button to apply any changes you made, if any. Note that in LINKED mode, saving is always automatic after changing the selection or closing the dialog.
In FULL mode, if you try to close the dialog with unsaved changes, you will be asked if you want to save them before exiting.
Filter
If the FILTER argument is used, files will be filtered using Opus wildcard syntax, so only files matching the given pattern are included.
In FULL mode, the filter is applied recursively to the contents of folders.
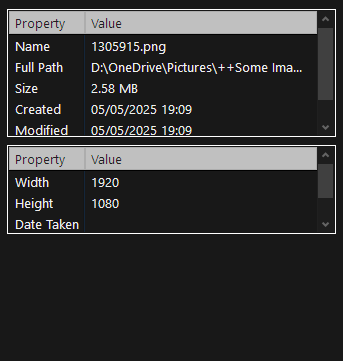
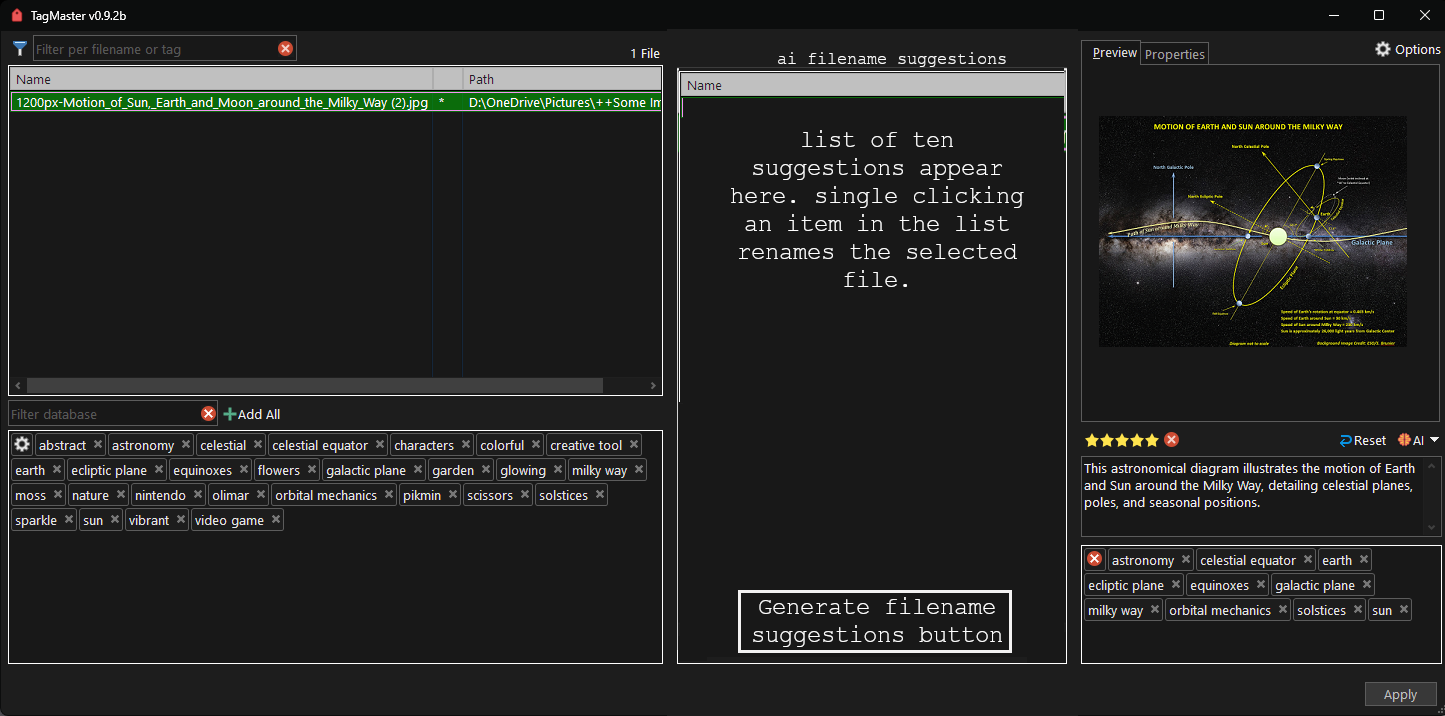
Preview and Properties
In FULL mode, you can see useful information about the selected files, and a preview. Use F6 to change to Preview and F7 to view the file properties.
Command arguments
Available arguments are:
| Argument | Type | Value | Description |
|---|---|---|---|
| FILES | /M | Sets the files to act on in FULL and AUTOTAG mode. If no files are specified, the ones selected in the active tab will be used. | |
| AUTOTAG | /O | Open the command in AUTOTAG mode. | |
| [model] | Specify any model to start AUTOTAG. Can be a built-in model or a custom one | ||
| unattended | Run AUTOTAG in unattended mode. This means there's no user intervention required. | ||
| nodesc | When using AUTOTAG, the generated description will not be used. | ||
| notags | When using AUTOTAG, the generated keywords will not be used. | ||
| nocats | When using AUTOTAG, the generated categories will not be used. | ||
| FULL | /O | Open the command in FULL mode. | |
| ai | Open the command in FULL mode with AI capabilities. | ||
| FILTER | /R | Pass a pattern using Opus wildcard syntax. | |
| NOADDTODB | /S | Makes the command's tag database read-only. | |
| RECURSIVE | /S | When reading folders, lets you choose whether to do it recursively or not. | |
| MANAGE | /S | Not yet implemented |
Technical notes
-
This add-in introduces 2(+1) novel concepts for scripts:
- Tertiary processing: All metadata reading is done separately from the main process (like in another command), with both processes communicating transparently to the user. This prevents the UI from freezing during heavy loads and allows stopping the command at any time (except while saving files). It also lets the UI show information as it becomes available, without having to finish processing the entire file stack, giving a smoother feel compared to other add-ins. Very useful when reading folders.
- Link to multi listers: The command can link to the current selection across multiple listers and respond smoothly for a JScript command, thanks to the use of timers and other implementations that showcase the scripting API's power.
- AutoTagging using AI: Explained in the "About AutoTag" section.
-
Files marked as "online only" are ignored in all cases.
-
The command uses an in-memory cache to speed things up and optimize resources. Once a file is read, it stays cached while the command runs. It can also detect file changes and will automatically update its data.
-
Folders are read non-recursively in
FULLmode (unless yo also use theRECURSIVEargument, and the filter is applied if set. -
In
LINKEDmode you can also use a filter, though it's not recommended because it can be confusing if you don't fully understand how it works. -
The command is NOT meant for files where the path type is shell|mtp|ftp|plugin|zip.
-
Most strings in the configuration dialog depend on the current Opus language. Any strings not translated will appear in English for most users unless you run Opus in Spanish (Mexico).
About Categories
v0.9.3b brings support for categories for keywords. The switch to that mode is automatic.
To organize your database, (for now) you must edit the JSON file located at /dopusdata\User Data\TagMaster\database.json, using the following format:
- Root object MUST contain a
categoriesproperty (and may optionally containuncategorized). categoriesis a recursive structure (categoryNode):- If a
categoryNodeis an array, that array must contain strings (these are the keywords). - If a
categoryNodeis an object, its keys are subcategory names and each value must again be acategoryNode(so nesting can continue arbitrarily). uncategorizedis an optional top-level array of strings used for tags that didn't fit any category.Keys(category names) are arbitrary non-empty strings, who shouldn't contain any of the following characters : $;\;/;:;_
Eg.
json
{
    "categories": {
        "cat1": [
      "tag1",
      "tag2"
    ],
        "cat2": {
            "cat2.1": {
                "cat2.1.1": [
          "tag3",
          "tag4",
          "tag5",
          "tag6",
          "tag7",
          "tag8",
          "tag9",
          "tag10",
          "tag11",
          "tag12",
          "tag13",
          "tag14",
          "tag15",
          "tag16",
          "tag17",
          "tag18"
        ],
                "cat2.1.2": [
          "tag7",
          "tag8"
        ]
            },
            "cat2.2": [
        "tag5",
        "tag6"
      ]
        }
    },
    "uncategorized": ["tag x", "tag y"]
}
From now on, when the command "reads" new keywords, it will include them in the "Uncategorized" category.
If you add keywords manually to the database, they will be added depending on the category currently selected. If the category is "All" or a "folder", they will be added to "Uncategorized".
"All" shows the list of all registered keywords.
It's also possible, if you have an AI model available, to use it to auto-sort keywords without a category. To do that, in FULL mode press the cog icon on the database control and choose the "Auto sort uncategorized" option.
The model used will be the one currently configured as active in the selector next to the AI button.
This method prevents the AI from inserting random new keywords. Depending on the model used, it may not be able to categorize all of them, but no keywords will be deleted (those without categories remain in "Uncategorized").
When using this feature, a backup of the database is created first, so it's safe to revert if you don't agree with the changes.
About AutoTagging
This command can use AI models (the most popular ones) to "understand" images and PDFs and suggest descriptions and tags.
AUTOTAG mode can be accessed from FULL mode when using the ai option (on the selected file), or as a standalone dialog that supports multiple files, invoked with the AUTOTAG argument.
Originally this script was intended for my personal use, and it was tightly integrated with another add-in that, among other things, lets you manage models and their API keys. Since that other script isn't finished, this one lacks a UI for managing models and API keys.
As a workaround, this script includes several known models by default. To use them, you must have the corresponding API keys set in environment variables. This is common practice, so if you already have keys stored, you can use this feature (the variable names should be the standard ones, e.g. OPENAI_API_KEY). I'm not going to explain here how to obtain or store them in envvars, there's plenty of detailed info online.
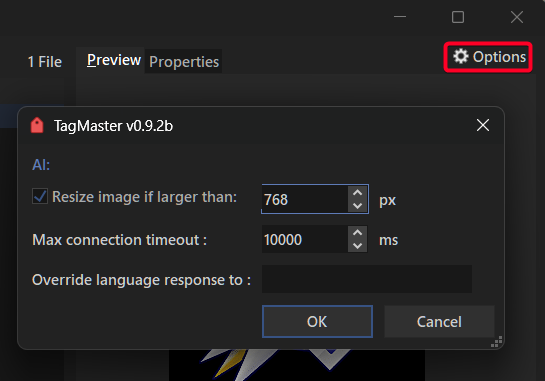
You have some extra AI-related configuration options. Click the Options button to open them.
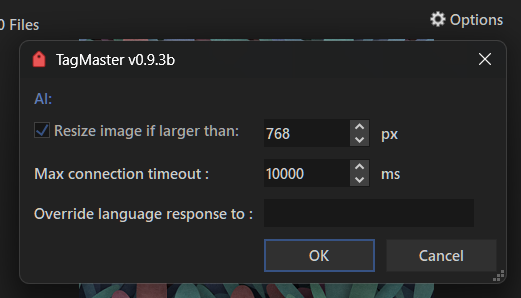
There you can choose whether to resize images and set the maximum width and height. This helps avoid unnecessary load from very large images.
You can also override settings like the response language; by default it uses Opus' current language. Enter a valid language name in English.
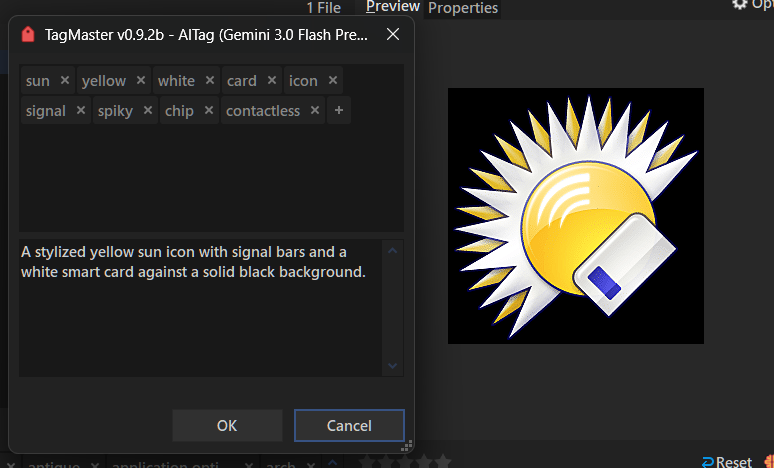
When the command starts it will detect if you have any keys installed and enable the corresponding models. In that case, when you select a single image or .pdf file, the AI button is enabled. Next to it you can choose from several enabled models.
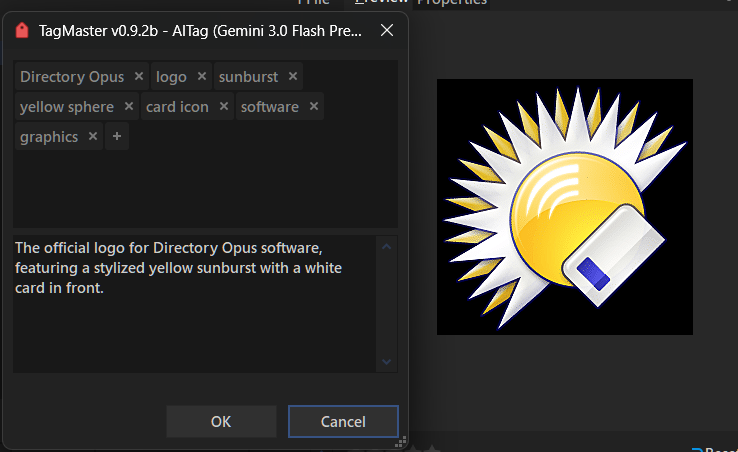
Once the request is made, the next window shows the results if there's a response.
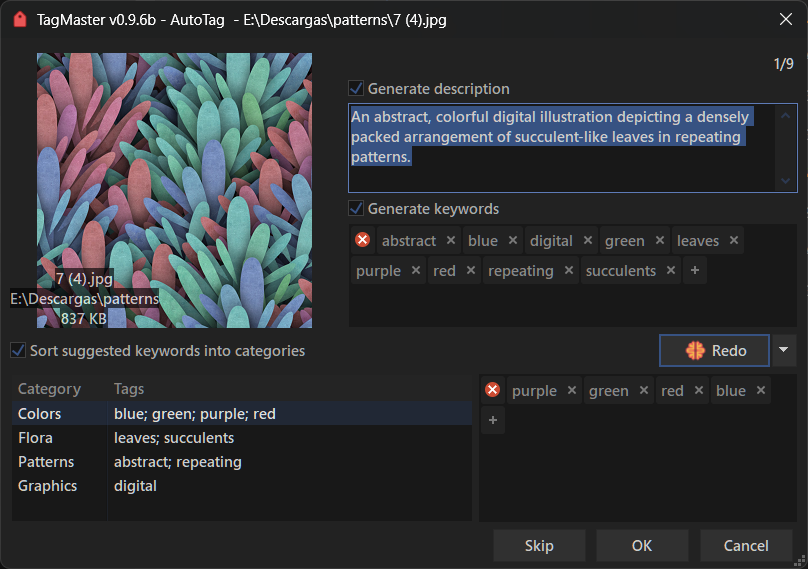
Results can be edited, discarded, or accepted.
Note 1 : This script does NOT upload any file to AI service servers automatically, nor does it misuse your credits. If you use it, you are fully responsible for the content you send, which is why the process is intentionally manual.
Note 2 : Images that are not .jpg, .jpeg or .png are automatically converted to .png and resize it before sending.
Note 3 : Images are sent "as is", without any metadata cleaning. So be careful with what you send.
The hardcoded models and the envvar they look for are:
| Model | ENV VAR |
|---|---|
| Mistral Models | MISTRAL_API_KEY |
| Gemini Models | GOOGLE_API_KEY |
| OpenAI Models | OPENAI_API_KEY |
Starting with v0.9.5, you can also bring your own custom models, like add-ons, and use them directly without modifying the script add-in. More details are available in the Custom Models section.
Autotag argument:
- Works identically to AutoTag in
FULLmode, but separately and with multiple files. - Optimizes processing time by pre-anticipating conversions and requests (requests are made ahead of time and not only for the file currently visible in the dialog). This maximizes throughput.
- In regular mode, it allows editing the obtained data as usual, as well as changing the model at runtime and redoing a request.
- Unattended mode automates processing with the chosen parameters and requires sufficient credits for the selected model (use common sense regarding the number of files to process).
- Some options accessible from the
FULLmode Options dialog apply here, such as image conversion and the language to use. - Files that encounter errors during processing are sent to a collection for identification. Useful especially in unattended mode.
- Consider this mode alpha: it may have bugs—please report them with reproducible steps.
Custom Models:
Originally, this script allowed loading models through a UI. As of v0.9.5 this feature is partially restored.
To add a new model, create a JSON file in /dopusdata\User Data\custom models.
Each model file must be a valid JSON containing at least the following data (example for using Ollama - cloud is shown below).
Note that placeholders are used to inject data into the JSON. Placeholders are: __prompt__ (required), __base64_file__ (required), __schema__, __text_schema__, and __mime_type__.
The data value must be the same valid JSON structure the model expects for sending files encoded in base64. Consult the specific model's documentation to know this format. text_data contains information for sending/receiving text. Both are optional if the model doesn't support that input type—but at least one must exist.
response holds an array that "leads" to the response in the JSON object the model returns. Consult the model's documentation for this.
The model must also support structured outputs, which this command uses to obtain the response. The schemas for both cases are provided by the command and should not be part of the JSON; use the __schema__ and __text_schema__ placeholders instead.
modal_vision, modal_text, modal_audio, modal_video, modal_docs indicate the input modalities the model accepts. For example, a model that supports image recognition should have modal_vision (required for this command).
api_name should contain the name of the environment variable (DO NOT PLACE YOUR API KEY here). If the model does not require a key, use no_api_needed.
If the model uses a key, auth must exist and must be an array of 2 values that will be sent as a header with the API key value. Most will use something like:
['Authorization', 'Bearer ']; but other variations exist such as
['x-goog-api-key', ''] ; in that case leave the second value empty.
DO NOT USE the built-in model names, as they will be overridden.
For Ollama, the command assumes Ollama is running at request time (it will not try to verify or launch the program).
json
{
  "name": "gemma3:27b-cloud 2",
  "display_name": "Ollama Gemma3 27B cloud 2",
  "api_name": "OLLAMA_API_KEY",
  "endpoint": "https://ollama.com/v1/chat/completions",
  "auth": ["Authorization", "Bearer "],
  "model": "gemma3:27b-cloud",
  "data": {
    "model": "gemma3:27b-cloud",
    "messages": [{
      "role": "user",
      "content": [{
        "type": "text",
        "text": "__prompt__"
            }, {
        "type": "image_url",
        "image_url": "data:__mime_type__;base64,__base64_file__"
            }]
          }],
    "response_format": {
      "type": "json_schema",
      "json_schema": {
        "name": "keywords_and_desc",
        "schema": "__schema__",
        "strict": true
      }
    }
  },
  "response": ["choices", "0", "message", "content"],
  "modal_vision": true,
  "modal_text": false,
  "modal_docs": false,
  "modal_audio": false,
  "modal_video": false,
  "max_size": 10485760
}
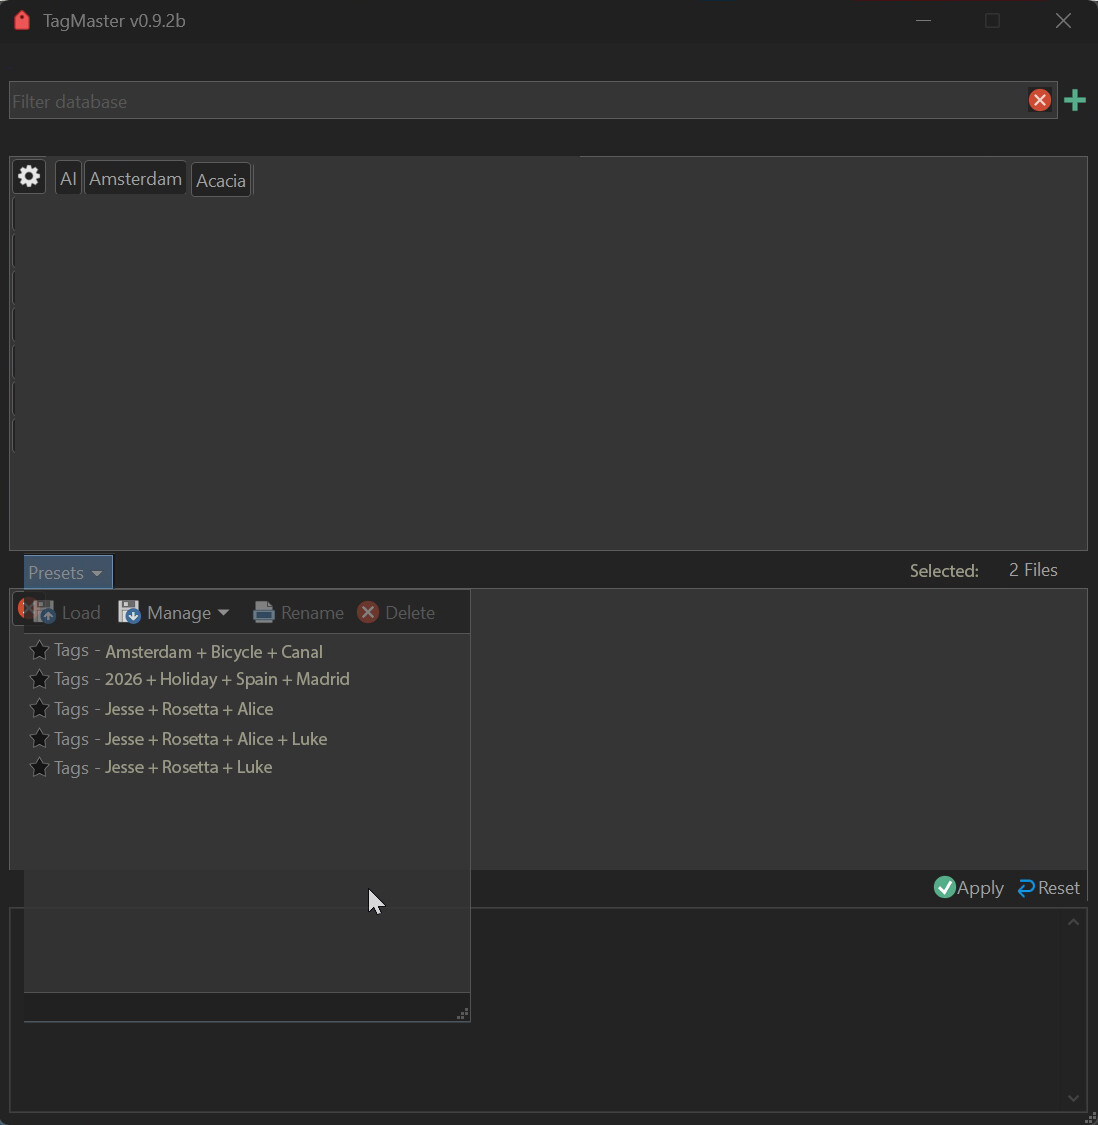
About the Manage DB window
Lets you manage your database through an easy-to-use interface. Can be invoked as a standalone dialog via TagMaster MANAGE or from existing dialogs, by pressing the Option button in the database pane, and selecting Manage categories and keywords.
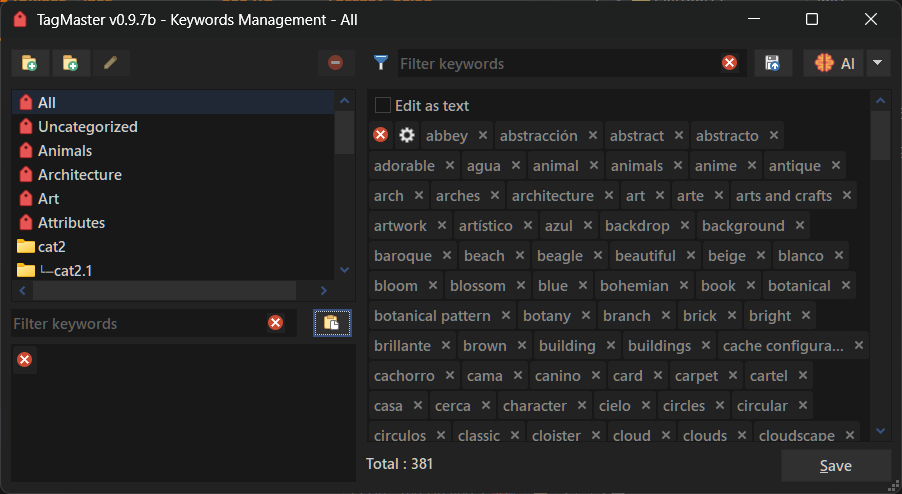
-
You can create new categories, folders, and nested categories.
-
You can delete entire categories.
-
You can rename categories.
-
You can add, edit, or delete keywords in any category.
-
You can import keywords from the Opus database.
-
You can auto-organize uncategorized keywords using the AI models you have available.
-
Create subfolders and subcategories inside folders (by right-clicking a folder).
-
It has a small stack that lets you copy keywords between categories when deleting them while holding Ctrl.
-
It includes an option so that when deleting keywords from a category, they are moved to the Uncategorized section instead of being deleted.
-
Hotkeys:
- F3: Focus filter.
- Escape: One time to clear the filter, another to close the dialog.
- F2: Rename selected category.
- Ctrl + N: Add new category.
- Ctrl + Shift + N: Add new folder.
Whenever you try to save your database from this window, a backup copy of your database will be saved, which you can find in /dopusdata\User Data\TagMaster.
If you want to help
If you're interested, try the script and report edge cases or any suggestion you might have. Feedback will guide the next improvements.
Any suggestions or test results are appreciated. ![]()
Currently the dialog are full translated to English and Spanish (Mexico). If you want to help to translate the dialog into your current language, feel free to send me a message.
Credits / Acknowledgments
- GPSoftware team for Directory Opus.
Disclaimer
This is an independent project that uses third-party AI services and APIs.
This project is not affiliated with, endorsed by, or sponsored by any of them.
All product and company names are trademarks or registered trademarks of their respective owners.