Iconset Maker Pixel Perfect (Updated)

Iconset Maker Pixel Perfect

Updated: 11/07/2024
xml utf encoding fix

Updated: 5/2/2024

  • iconified
  • refactored
    see end of post for download

image

(TL;DR – install script, make button, click button)

For creating Directory Opus icon-sets. Dual mode and normal iconsets.

This program is different to Iconset Maker v2 - Icons - Directory Opus Resource Centre (dopus.com)

Here is an example of what is possible - it is the V13 internal set but dual mode (the other mode is a batch conversion colour change)
Internal Icon Set (Flat) Dual Brown.dis (331.1 KB)

  • It is more complex to use than Iconset Maker.

  • It does not use montage to scale any images.

  • It does use montage to stitch images together into iconsheets.

  • It produces normal iconsets OR the new dual iconsets.

  • Dual mode iconsets need 4 images per icon.

  • Light coloured icons in Mode 1 folders, dark coloured icons in Mode 2 folders.

  • It can produce pixel perfect iconsets.

  • Pixel Perfect means they are made by hand and not scaled at any point.

  • Scaling images always produces blemishes to some degree or other.

INSTRUCTIONS

  • Install the script package at the end of this post.

  • see How to use buttons and scripts from this forum

  • Make a button on a toolbar with the command IconsetMakerPixelPerfect

  • Put the iconset folder somewhere.

  • The name of the folder is used to set the name for the iconset.

  • Put montage.exe in the folder (see end of post about how to get it) OR set path to monatge.exe in script preferences.
    image

  • Click the button with the command IconsetMakerPixelPerfect.
    It will initially create 2 or 4 sub-folders and then close.

  • Put some images in the folders.

  • Only PNG images will be processed.

  • Use square images only.

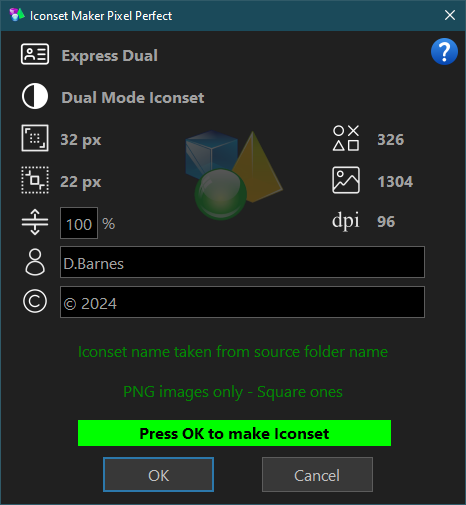
  • Directory Opus uses 2 image sizes for an icon, Large and Small.

  • Put large images in the Large folder and Small images in the Small folder.

  • Because no scaling is involved the size of the images are important.

  • Directory Opus default sizes are 32px for large and 22px for small.

  • The first images in the Large and Small folders are used to set the sizes of the iconset.

  • All the Large images must be the same size.

  • All the Small images must be the same size.

  • The Large images must be larger than the Small images.

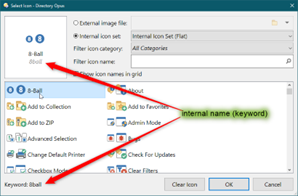
  • Naming the images, the filenames will be used as the internal names for the icons,

  • To make the icons automatically change then the new names need to be the same as a previously installed iconset icon name (or the default iconset) AND the iconset needs to be above the iconset with the old internal name.
    image

  • Click the button again, the instructions will step you through the process.

When finished the .dis iconset file will be in the source folder with montage.

It can now be installed from Preferences/Toolbars/Icons and clicking the ‘Import’ icon at the top of the list or dragging & dropping it into the list.

Montage
Montage is a free small executable used to scale and stitch images into the two ‘icon sheets’ that Directory Opus will use for large and small icons. It is part of the suite of programs that come with Imagemagick.

Download the latest ImageMagick portable from the imagemagick
website, there are a few to chose from at the bottom of the page (8-bit is quicker), extract montage.exe from it

Or

Here is the version from ‘ImageMagick-7.1.0-portable-Q8-x64.zip’
montage.zip (9.2 MB)

The Script
updated : added DPI setting
updated: added path to montage in script user configuration
updated: changed dialog positioning
updated: changed some messages
updated 2/1/2024: cosmetic improvements
(OLD - text interface)
Iconset Maker Pixel Perfect.opusscriptinstall (221.4 KB)

(NEW - iconified interface)
Iconset Maker Pixel Perfect.opusscriptinstall (416.4 KB)

update 02/03/2024 - works in Libraries now
Iconset Maker Pixel Perfect.opusscriptinstall (416.5 KB)

update 07/05/2024 - some small QoL improvements
Iconset Maker Pixel Perfect.opusscriptinstall (416.7 KB)

update 11/07/2024 - utf encoding fix
Iconset Maker Pixel Perfect.opusscriptinstall (416.7 KB)

Enjoy
4 Likes

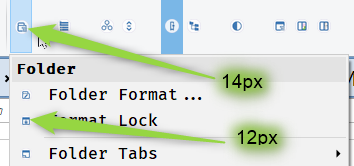
If you want to make the same size as Windows system icons, how to operate, like dopus minimum support 22px, less than 22px icons forced to display 22px.

Smaller should work, at least if they are the only icons on a toolbar.

image
These were done using Iconset Maker v2 - Icons - Directory Opus Resource Centre (dopus.com) which is easier to use than this one.

If using Iconset Maker Pixel Perfect, you could let it create the 2 large & small folders and make sure all the images in large folder are 14px x 14px and all the images in the small folder are 12px x 12px.

You're right, when there's only 16px icons in the toolbar, it's fine.I now replace all my dopus with 16px to keep the same icons as Windows comes with。There is no big boss can make tools to generate all the iconset 16px effect, currently according to the iconset zoom to achieve 16px effect, I still do not understand, can provide a few examples to refer to it.。

Hi galaxyhub,
trying your script I had an issue with your dialogs. They appeared extremely small on my system with system DPI-factor 250%. After some try & error I found that I have to change fontface="Arial Bold" (lines 912,922,947 and 955 of the script) to the german fontface="Arial Fett" to get properly scaled dialogs. I'd suggest to not define a fontface at all so the default system font is used to avoid this.

Another issue with high-DPI settings is that it's not possible to create "Pixel Perfect" Iconsets with your script without editing the XML-file manually. On my system DOpus will upscale the default 22px and 32px icons 250% to 55px and 80px. So for a "PixelPerfect" result I need to provide PNG's with these sizes. To prevent DOpus from upscaling them to 138px and 200px I need to change the line <dpi base="100" /> to <dpi base="250" /> in the XML-file. I'd suggest to add an option to change this setting to the dialog.

Many thanks for input. Please try new version above, :slight_smile:

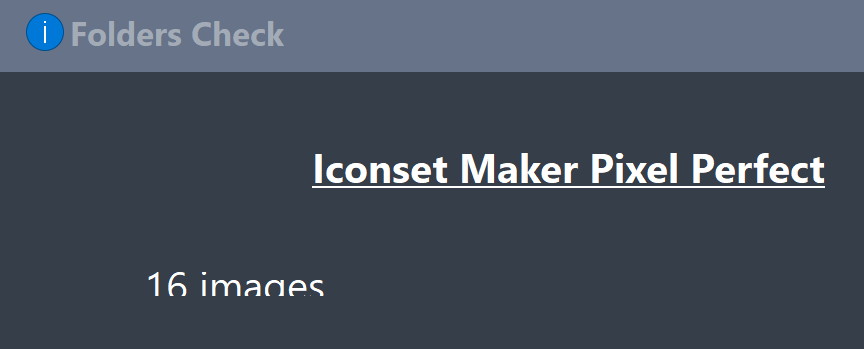
Works fine now here. Just two small glitches with the dialogs. Some static controls are too small now so the text is cut off like the "16 images" line in the Folder dialog:

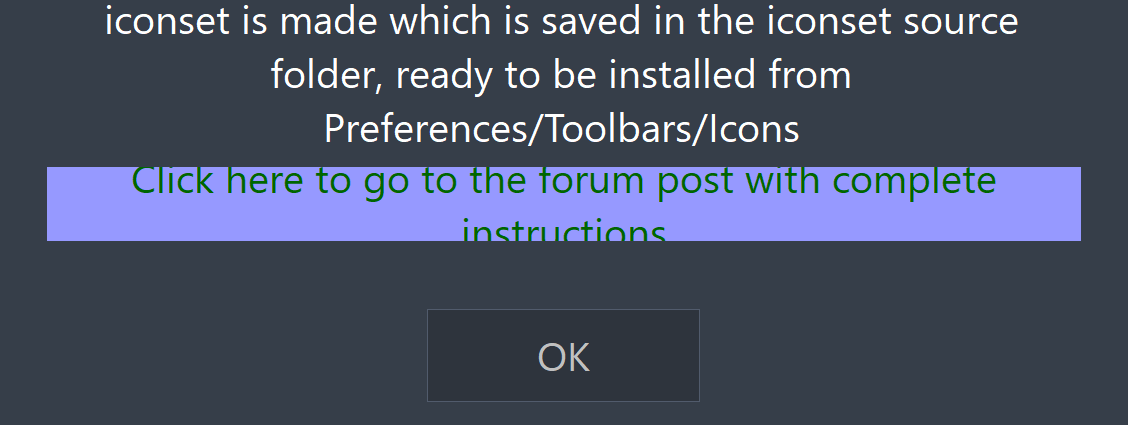
The other glitch is static5 of the Info-dialog:

Just one more suggestion:
You could add an option in the script configuration to provide a fixed path to montage.exe. I changed your script to do this with these changes:

  • Change lines 73-75 to this:
	// user options
	initData.config_desc = DOpus.Create.Map;
	initData.config.Logging = false;
	initData.config_desc("Logging") = "Toggle the Logging on/off"
	initData.config.PathMontage = "";
	initData.config_desc("PathMontage") = "Provide path to montage.exe";
  • Change line 97 to this:
    var montagePath
    if (DOpus.FSUtil.Exists (Script.config.PathMontage + "\\montage.exe")) {
        montagePath = Script.config.PathMontage + "\\montage.exe"
    } else {
        montagePath = sourcePath + "\\montage.exe"
    }
  • Change lines 716 and 747 to this:
    montage += (montagePath + " ");

The changes doesn't break the "check if montage.exe exists" functionality of your script and montage.exe is still anticipated to be in sourcePath as long as no working path for "PathMontage" is provided in the script configuration.

Thanks. Dialogs look okay on my setup, have changed the 2 you have posted and also implemented your suggestion about montage. Again many thanks for useful input. New version is posted above.

Thanks galaxyhub, used it to make my own dual mode set. Works great.

Like a good old usb 2, my first attempt at dual mode was dark icons for dark theme, it seems mode 1 is dark, mode 2 is light, slightly counterintuitive!

Agree. It is a bit confusing -

  • dark mode with light coloured icons
  • dark coloured icons for light mode

Which is why the folders are named Mode 1 and Mode 2, the names are easily changed at around line 146 in the code -

	var FOLDER_NAMES =
	[
		'Mode1 Large icons',
		'Mode1 Small icons',
		'Mode2 Large icons',
		'Mode2 Small icons'
	]