Windows Defender problems
We have seen a number of users encounter problems caused by Windows Defender, the built-in Windows virus checker.
Skip to Avoiding Problems below if you just want to know how to fix things.
Some of the issues Defender causes can also happen with other antivirus, but Defender is a particular problem because it is used by so many people, and it is both prone to false positives and bad at telling you what is happening.
The problems can manifest in a number of ways; for example:
- When you download or install an Opus upgrade, the "SmartScreen Filter" may prevent you from doing so.
- You may have problems when attempting to copy or delete files in certain folders, or certain types of files, or files containing certain data. These can include "access denied" errors, or things failing without any error at all, or unexpected UAC prompts.
- Configuration data may not be loaded or saved properly.
- You may encounter slowdowns when reading folders. (The mere act of opening a file to extract its icon can trigger Defender into doing a full virus scan of the file. Defender also seems poor at caching the results of these scans.)
While problems downloading updates can affect other software as well, file managers are acutely affected, since they inherently need to work on files outside of their own folders, including your documents, which antivirus and ransomware protection tend to (rightly) be more cautious about.
In many cases, these problems are exacerbated by Defender breaking things but not telling you what happened. This makes software look broken when it isn't, and makes no sense from a security perspective: If Defender has a real reason to suspect software is acting suspiciously and that you are under attack then it should tell you so you can take appropriate steps; instead, if often does not tell you it got involved at all and simply makes software look broken.
Digital Signatures
Like a lot of Windows software, Directory Opus is "digitally signed" with a certificate, using Microsoft's Authenticode system. This allows users to check the software's origin and that it has not been tampered with.
Unfortunately, one of the design choices Microsoft made with Defender was to automatically distrust certificates which aren't "well known". When Defender encounters a program signed by a certificate it hasn't seen before (or seen "much") it will respond by treating it as a threat.
At the time of writing, we saw a spate of problem reports which we believe was a result of renewing our code-signing certificate. Certificate renewal is standard, and has to be done every three years. Once "enough" users download, install and run newer versions of Opus signed with the new certificate, Defender starts to trust the certificate more, but until then it can cause strange problems for several weeks.
Avoiding Problems
If you're using something better designed than Defender (e.g. ESET NOD32, Norton AV, or similar) then this should not be an issue for you. But if you are using Defender and you encounter the problems described above, or other strange behaviour, then we recommend you configure Defender to exclude Directory Opus. This has proven to solve several strange issues which some of our users experienced.
Defender has two separate places which Directory Opus should be excluded from:
- Virus & threat protection
- Ransomware protection
This is a simple process, but unfortunately requires clicking through multiple layers of Windows UI.
To add exclusions to Windows Defender in Windows 10:
-
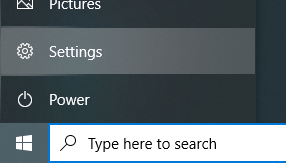
Open the Start menu and click the Settings icon.
-
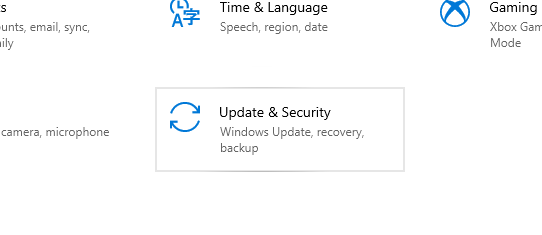
Select Update & Security.
-
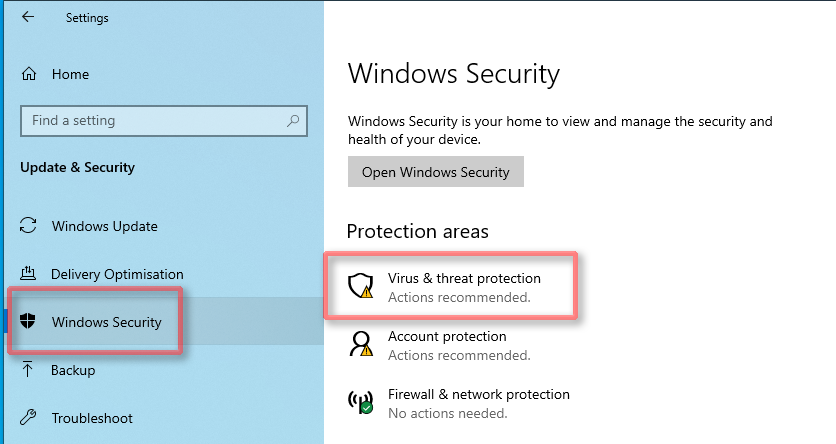
Select Windows Security on the left, then Virus & threat protection on the right.
-
Under Virus & threat protection settings, click Manage settings.
-
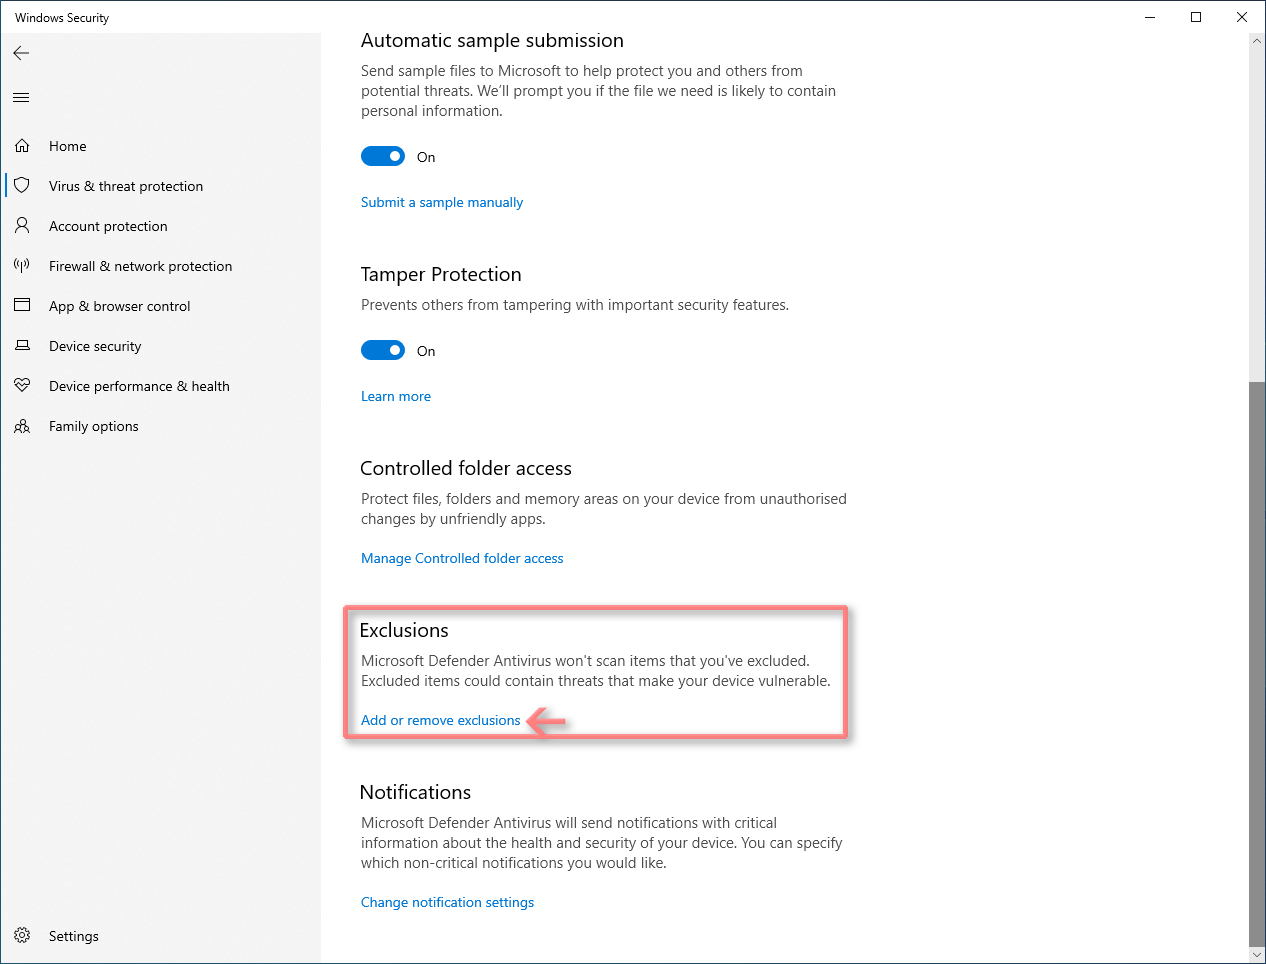
Scroll to the bottom of the dialog.
Under Exclusions, click Add or remove exclusions.
-
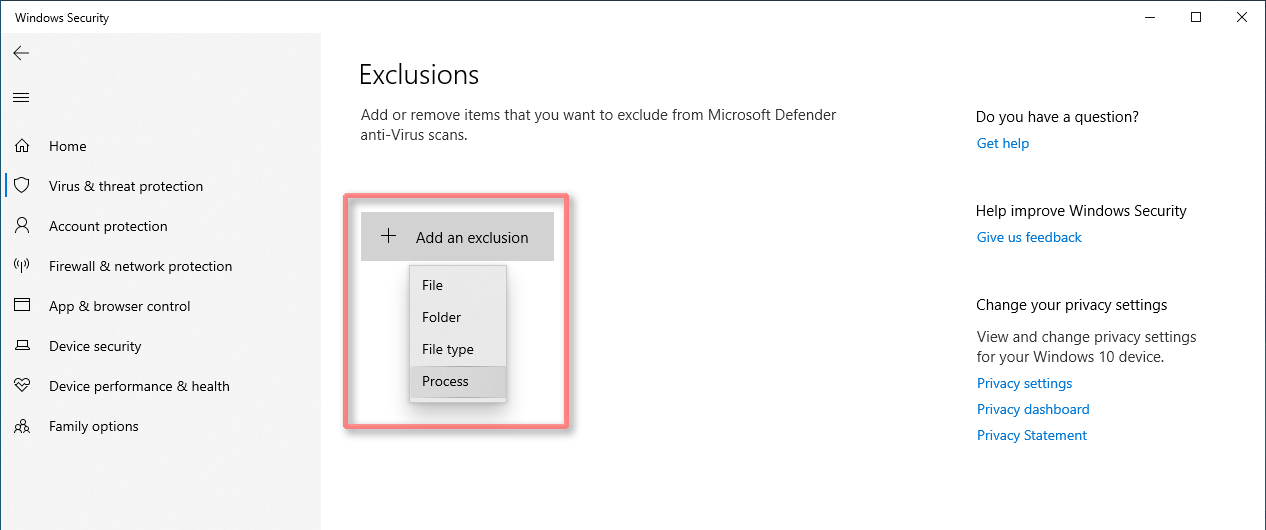
Click Add an exclusions and then Process.
-
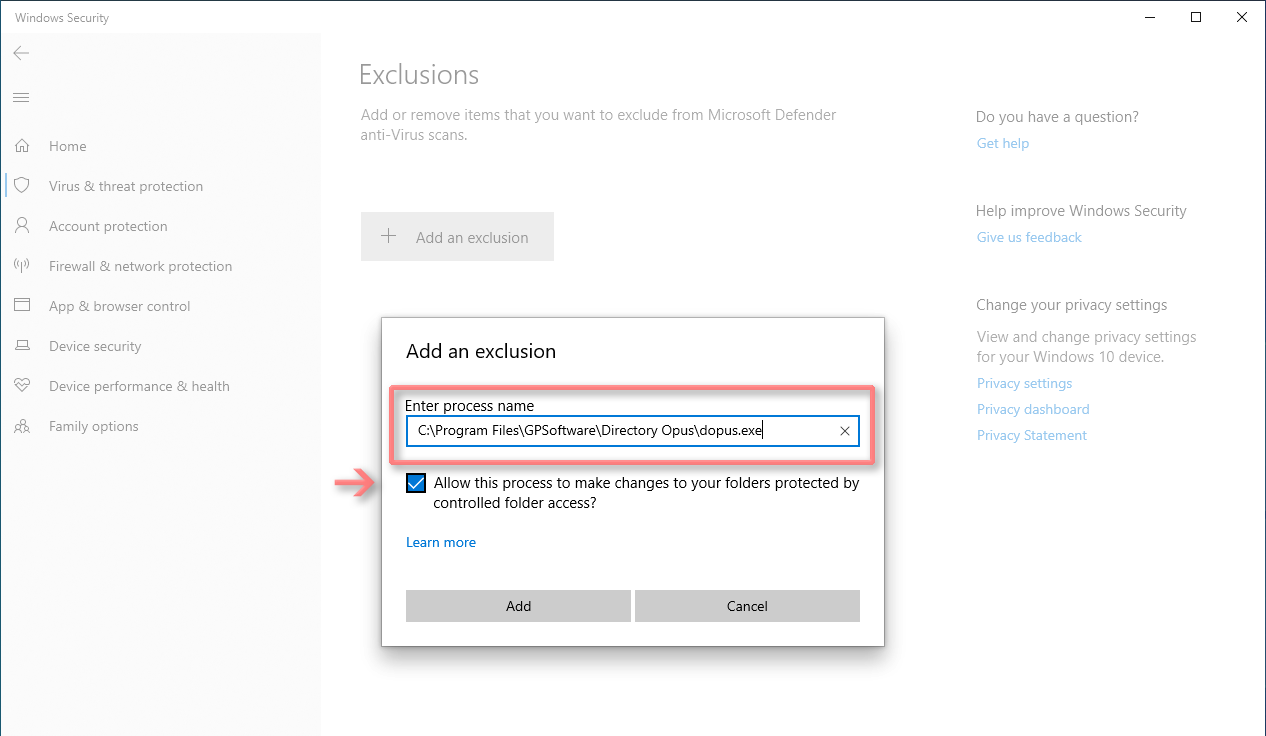
Enter the full path to dopus.exe as the process name. This is usually:
C:\Program Files\GPSoftware\Directory Opus\dopus.exe(If you are unsure where Opus is installed,
dopus.exeon its own also works, but specifying the full path is more secure. You can type/homeinto the path field in Opus to locate the correct folder.)Important: If the Allow the process to make changes to your folders... option appears under the edit box, ensure it is turned on (ticked), the same as in the screenshot below.
Now click Add.
-
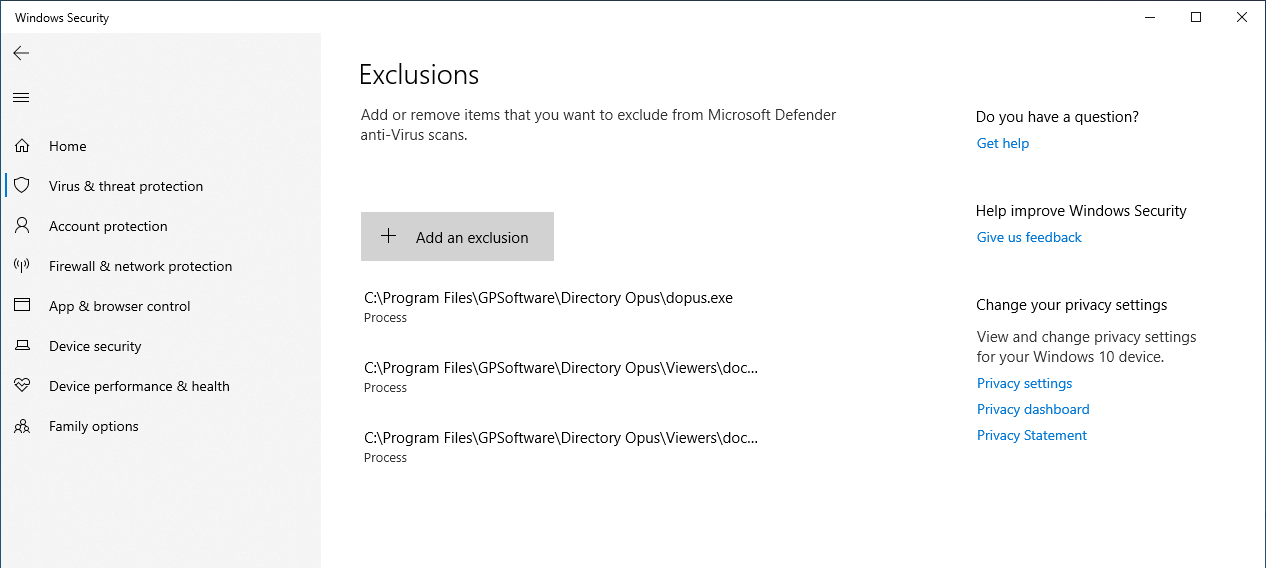
(Optional) To avoid problems viewing documents, do the same for these two processes:
C:\Program Files\GPSoftware\Directory Opus\Viewers\docsvw32.exeC:\Program Files\GPSoftware\Directory Opus\Viewers\docsvw64.exe

That should be everything you need to do for now.
If Ransomware protection is turned on later...
If Defender's Ransomware protection (also known as Controlled folder access) was turned off when you did everything above, and then later turned on, then you may need to do some extra steps (depending on what you did when you turned it on).
-
Follow the first 4 steps above again.
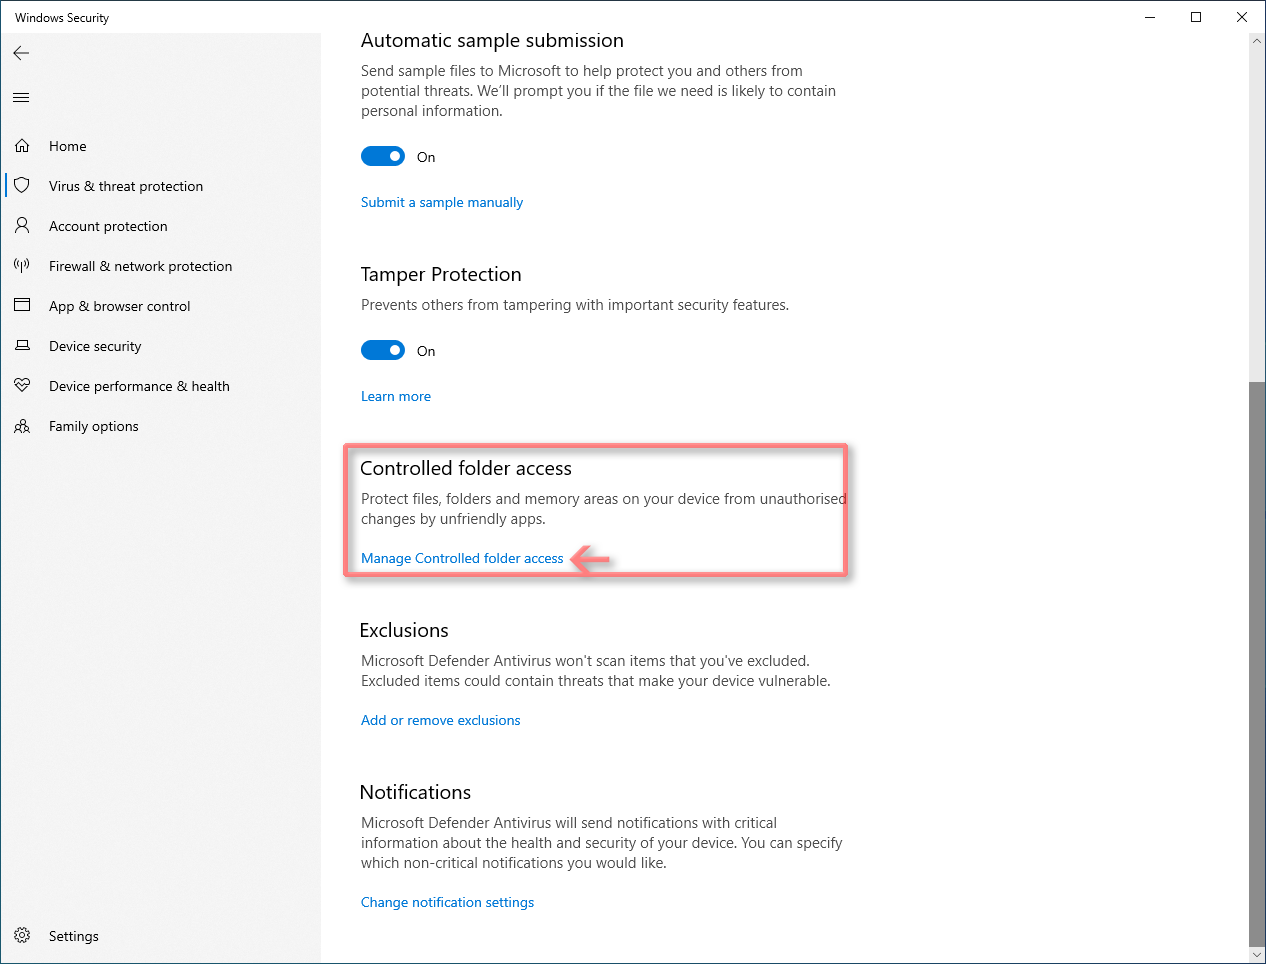
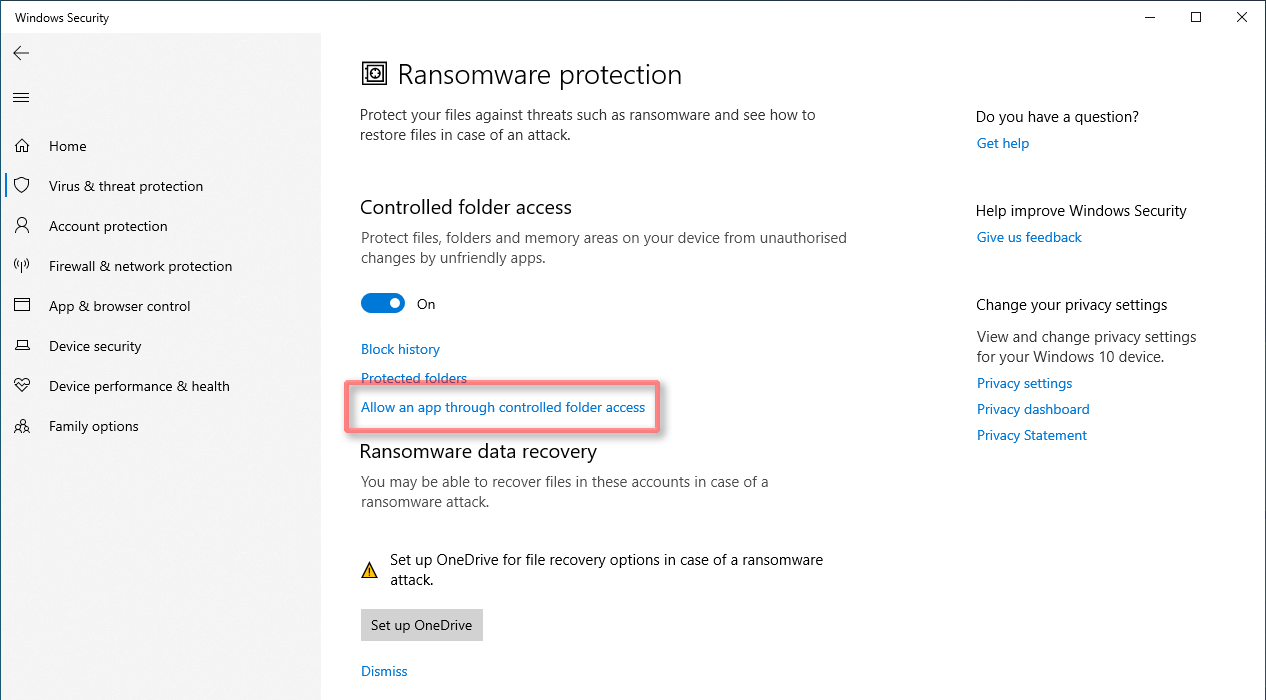
Scroll to the bottom of the dialog, as before, but this time select Manage controlled folder access (instead of Add or remove exclusions).
-
If Controlled folder access (Ransomware protection) is turned off here, you don't need to do anything else.
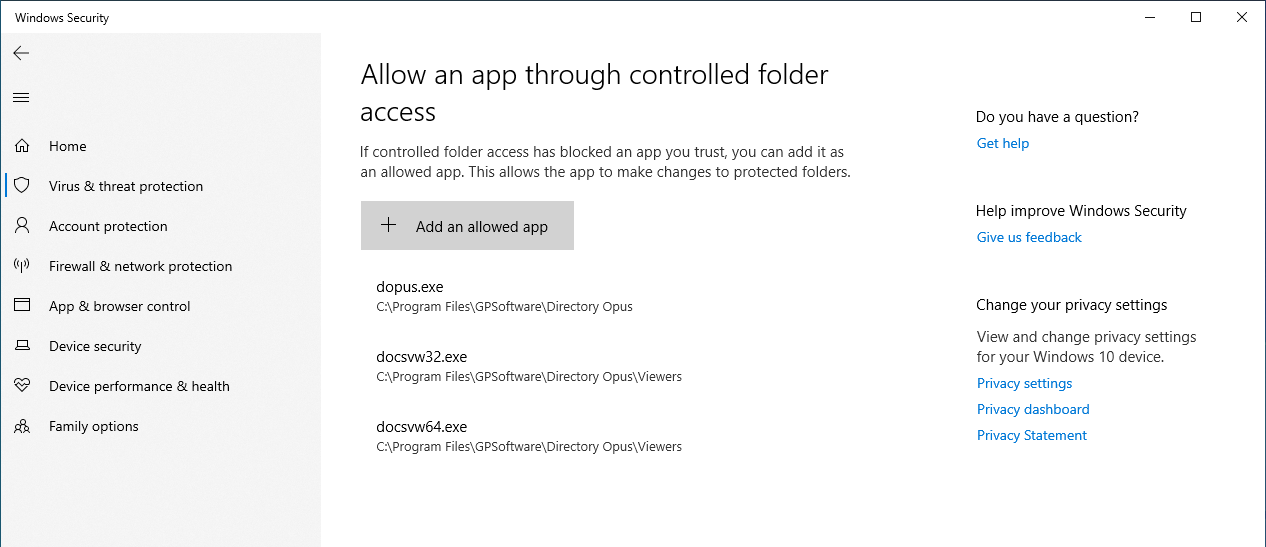
If it is on, click Allow an app through controlled folder access.
-
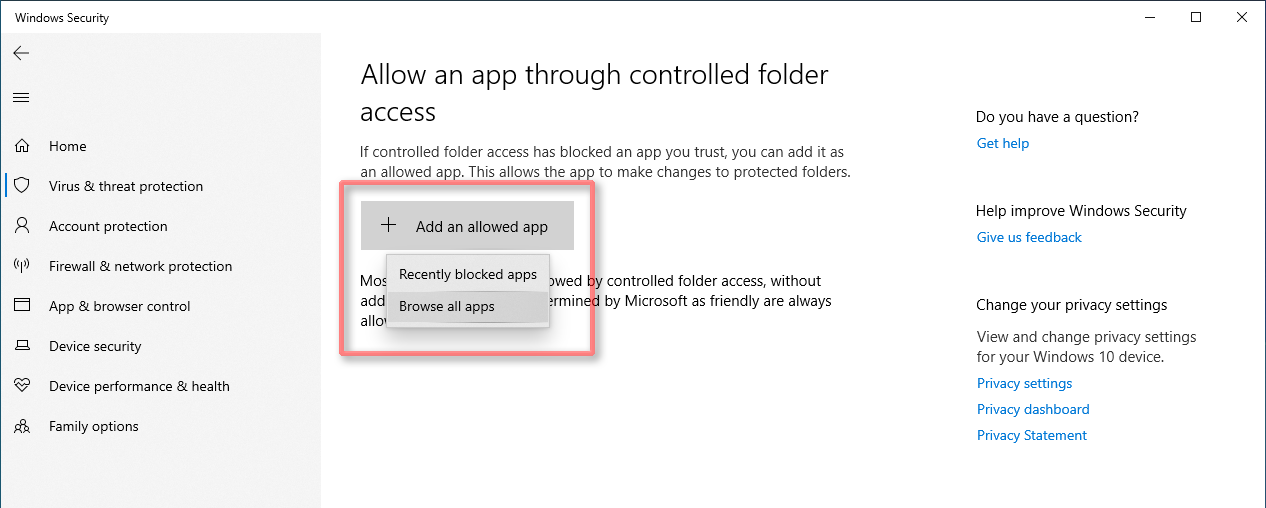
If the Directory Opus executables are already in the exclusions list, you don't need to do anything else.
Otherwise, click Add an allowed app and then Browse all apps.
-
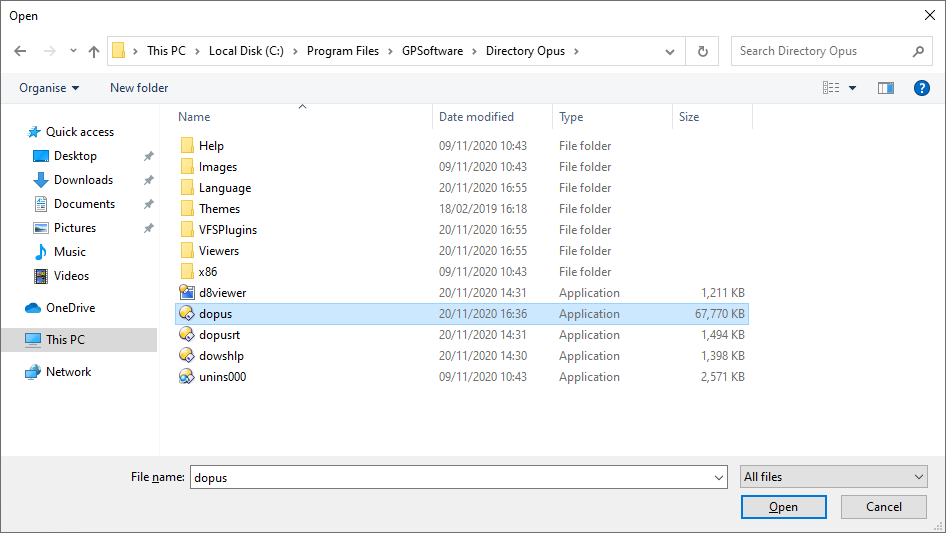
Browse to
C:\Program Files\GPSoftware\Directory Opusand double-clickdopus.exe(ordopus, if Windows is hiding file extensions). -
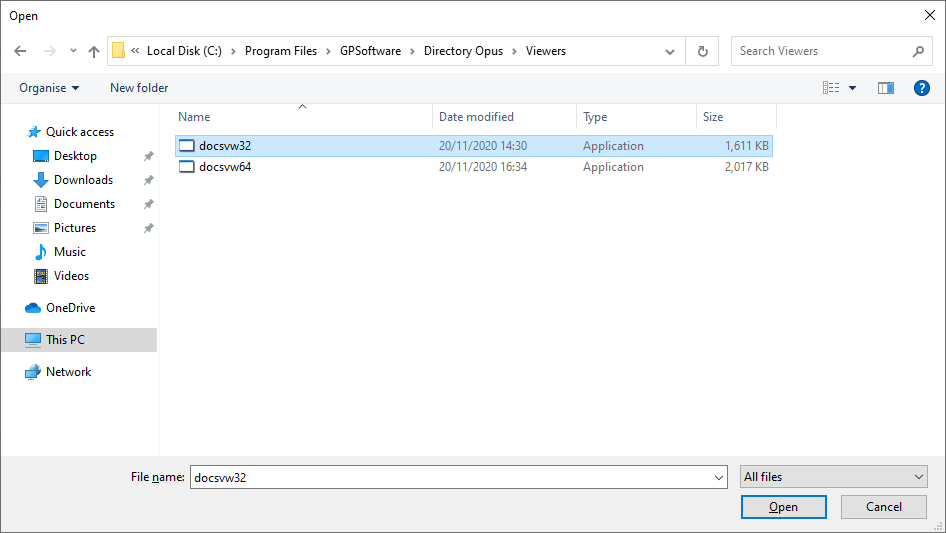
(Optional) To avoid problems viewing documents, do the same for these two processes:
C:\Program Files\GPSoftware\Directory Opus\Viewers\docsvw32.exeC:\Program Files\GPSoftware\Directory Opus\Viewers\docsvw64.exeYou should now see all three processes in the exclusions list:
(Please let us know if the instructions above become out of date due to Microsoft rearranging things.)